
The pursuit of strength, resilience, and a healthier self often begins with a simple desire: to transform. For many, this journey leads to the creation of a home gym – a personal sanctuary where sweat meets determination. And at the heart of nearly every serious home gym, anchoring the ambition and facilitating the gains, stands one indispensable piece of equipment: the power rack.
More than just a metal cage, a power rack is a commitment to your fitness goals. It’s a silent spotter, a versatile training station, and a catalyst for consistent progress. Whether you’re taking your first steps into serious weight training or an intermediate lifter striving to smash through plateaus, understanding how to harness the full potential of a power rack is key to unlocking new levels of strength and confidence. This comprehensive guide will illuminate the profound benefits of integrating a power rack into your fitness routine, walk you through selecting the right one, provide actionable advice on effective workouts, and offer strategies for progressive programming, all designed to help you forge your fortitude right in your own space.
The Unrivaled Core of Your Home Gym: Why a Power Rack?
Investing in a power rack is arguably the most impactful decision you can make for your home strength training. Its value extends far beyond simply holding a barbell; it fundamentally redefines the possibilities of your personal fitness journey.
Safety First: Your Built-in Spotter
One of the most compelling reasons to own a power rack, particularly for those training alone, is the unparalleled safety it provides. The core feature of any power rack is its robust safety system, typically comprising horizontal safety bars, pins, or straps that span the depth of the cage.
- Fail-Safe Mechanism: These safeties are designed to catch the barbell if you fail a lift, preventing injury and damage. Imagine attempting a heavy squat or bench press and hitting a wall – without a spotter or safety mechanism, this could lead to serious harm. With a power rack, you can push your limits confidently, knowing the safeties have your back.
- Empowerment in Training: This built-in safety empowers you to train harder and explore your true strength potential without the constant worry of getting pinned. It eliminates the need for a human spotter for many major lifts, making solo training sessions not only feasible but incredibly effective.
- Mental Confidence: Knowing you have a safety net allows for greater mental focus on the lift itself, rather than on the fear of failure. This psychological advantage can translate directly into improved performance and faster progress.
Versatility Unleashed: Beyond Squats and Bench
While synonymous with foundational movements like squats and bench presses, a power rack’s utility stretches far beyond these staples. It serves as a multi-functional hub for a complete, full-body workout.
- Core Compound Lifts: Naturally, it’s ideal for barbell back squats, front squats, overhead presses, and bench presses, offering adjustable J-hooks to set the starting height for each exercise perfectly.
- Targeted Strength Work:
- Rack Pulls: By setting the safety bars at various heights, you can perform rack pulls, targeting specific segments of the deadlift for improved lockout strength.
- Pin Presses: Similarly, pin presses allow you to focus on the top portion of the bench press, addressing sticking points and building tricep strength.
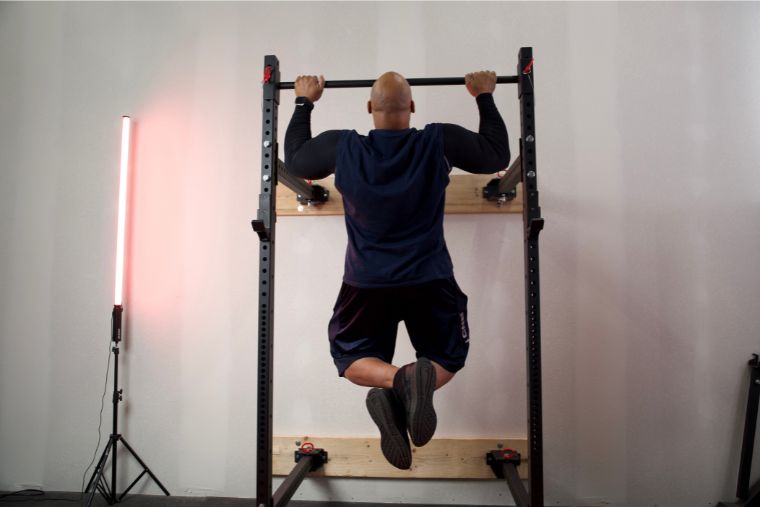
- Inverted Rows: The safety bars can also be set up for inverted rows, a fantastic bodyweight exercise for back and bicep development.
- Bodyweight Integration: Most power racks come equipped with a pull-up bar, opening up a world of bodyweight exercises including pull-ups, chin-ups, and hanging leg raises. Many are also compatible with dip attachments, further expanding your bodyweight training options.
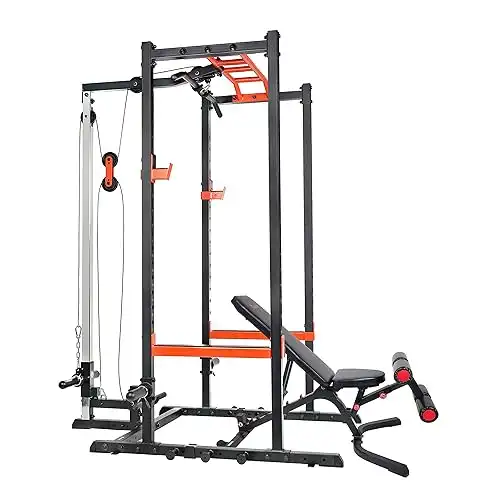
- Accessory Adaptability: With various attachments available, a power rack can transform into a comprehensive training station:
- Resistance Bands: Attach bands to the rack and barbell for accommodating resistance, increasing tension at the top of a lift.
- Landmine Attachments: Unlock rotational movements, landmine presses, rows, and squats.
- Cable Pulley Systems: Some racks integrate high/low pulley systems for lat pulldowns, cable rows, tricep pushdowns, and more.
Progressive Overload Made Simple
The principle of progressive overload – consistently increasing the demands on your muscles to stimulate growth and strength – is the bedrock of effective strength training. A power rack facilitates this process seamlessly.
- Easy Weight Increments: With quick and secure J-hooks, adding or removing weight plates becomes a smooth operation, allowing you to steadily increase the load on your barbell as you get stronger.
- Repetition and Set Progression: The stability and safety of the rack enable you to push for more repetitions or sets, challenging your muscular endurance without compromising safety.
- Technique Refinement: The controlled environment of a power rack allows you to focus purely on refining your lifting technique, which is crucial for long-term progress and injury prevention. You can set the safeties to assist with partial reps or specific ranges of motion to address weaknesses.
Consistency and Convenience at Your Fingertips
Life often gets in the way of gym visits. A power rack in your home gym removes many common barriers to consistent training.
- No Commute, No Excuses: Eliminate travel time, parking hassles, and waiting for equipment. Your gym is always open, whenever you are.
- Train on Your Schedule: Whether it’s a quick 30-minute session before work or a longer workout late at night, your power rack accommodates your personal timetable.
- Privacy and Comfort: Train in an environment where you feel most comfortable, free from judgment or distractions, allowing you to focus entirely on your workout.
- Cost-Effective Long-Term: While an initial investment, a power rack significantly reduces or eliminates ongoing gym membership fees, proving highly economical over time.
Choosing Your Foundation: What to Consider in a Power Rack
Selecting the right power rack is a pivotal decision that impacts your training experience for years to come. It’s not just about finding the cheapest option; it’s about investing in a piece of equipment that aligns with your space, budget, and fitness aspirations.
Space and Dimensions: Measure Twice, Buy Once
Before you even start browsing, grab a measuring tape. Your available space dictates the type and size of rack you can accommodate.
- Footprint: This refers to the base dimensions of the rack. Ensure you have enough floor space, not just for the rack itself, but also for a weight bench, barbell movement, and loading/unloading plates. A general rule is to leave at least 2-3 feet of clear space around the rack.
- Height: Crucial for basement gyms or rooms with low ceilings. Standard racks are often around 85-90 inches tall. If your ceiling is lower, you’ll need to look for "short" power racks, typically around 72-80 inches. Also consider your own height if you plan on using the pull-up bar – you want enough clearance to hang freely.
- Depth: The depth of the rack determines the internal training space. Deeper racks offer more room but take up more floor space. Shorter depths are suitable for tighter areas but might feel restrictive for some movements.
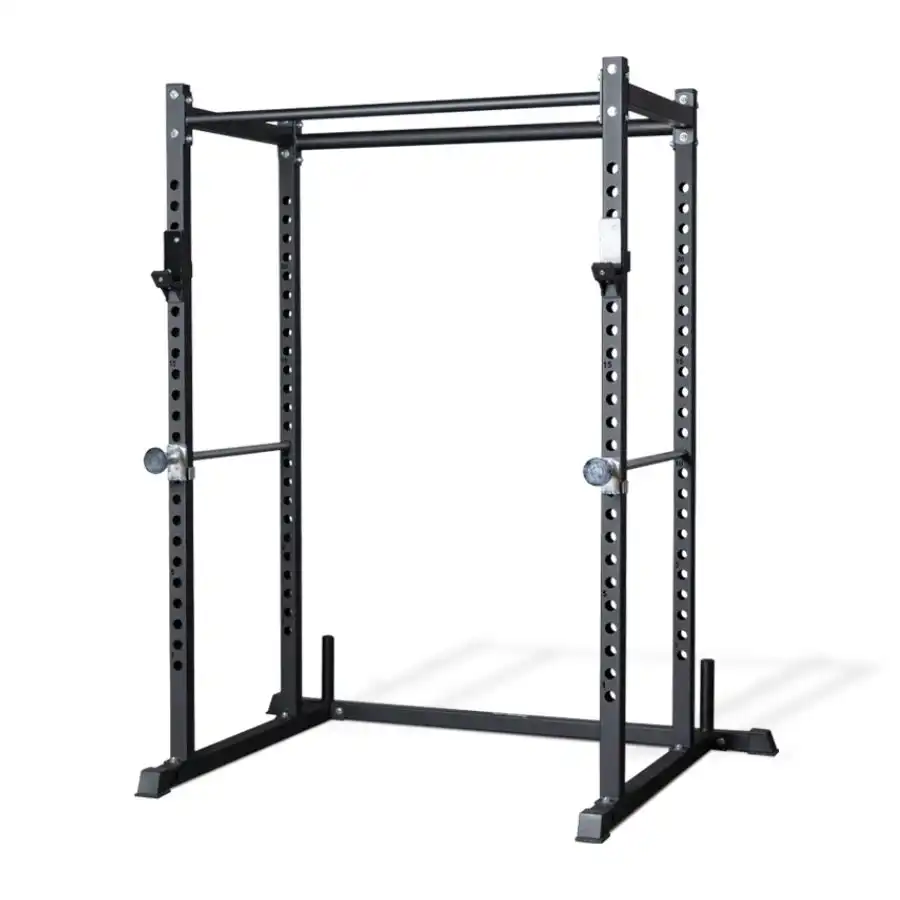
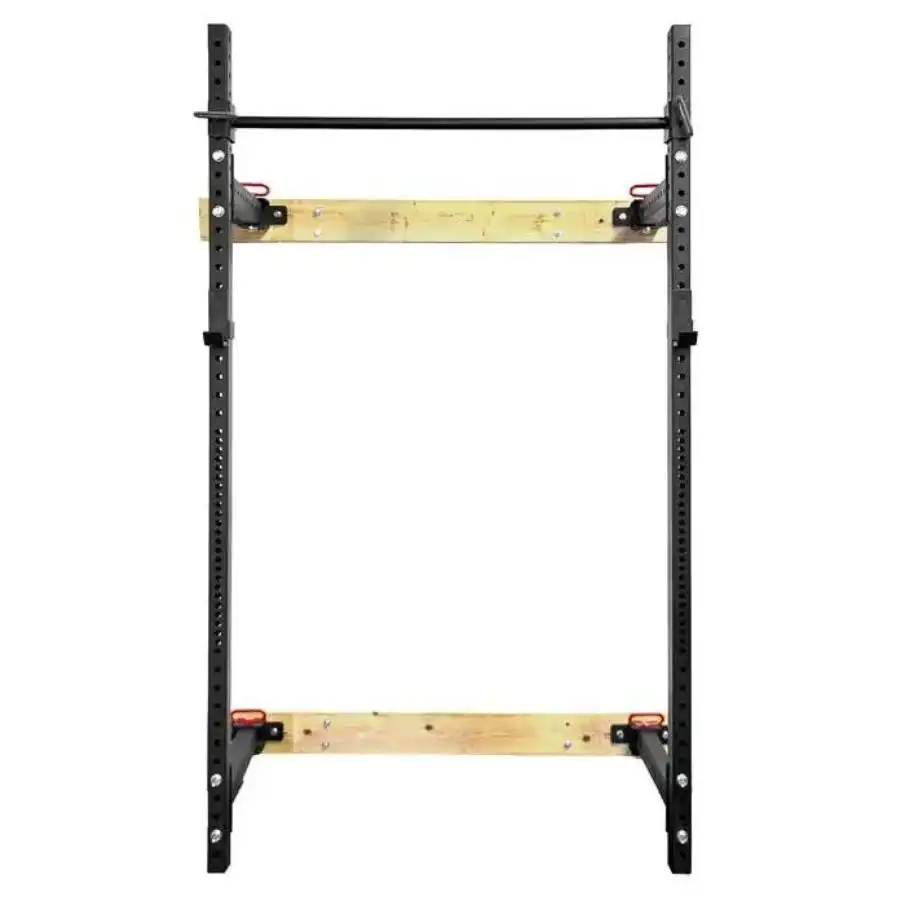
- Folding vs. Full Racks: If space is at an absolute premium, a wall-mounted folding power rack can be an excellent solution. These fold flat against the wall when not in use, reclaiming valuable floor space. Full power racks offer maximum stability and versatility but require dedicated space.
Construction and Durability: The Backbone of Your Strength
The quality of construction directly relates to the rack’s stability, weight capacity, and overall longevity.
- Steel Gauge: This indicates the thickness of the steel tubing. Lower gauge numbers mean thicker steel.
- 11-gauge: Heavy-duty, industrial-grade steel, offering maximum strength and stability. Ideal for serious lifters or those planning to lift very heavy.
- 12-gauge: Still very strong and common for quality home gym racks, suitable for most intermediate lifters.
- 14-gauge: Lighter duty, often found in more budget-friendly options. Sufficient for beginners and lighter lifting but may exhibit more flex under heavy loads.
- Upright Size: The dimensions of the vertical posts (e.g., 2×2 inch, 2×3 inch, 3×3 inch). Larger uprights generally correlate with higher stability and weight capacity, and often better compatibility with specialized attachments.
- Weight Capacity: Check the manufacturer’s stated weight capacity for both the rack structure and individual components like J-hooks and safety bars. Ensure it significantly exceeds your current and projected lifting maximums.
- Stability: A well-built rack should feel solid and stable, even when unracking heavy weight. Some racks can be bolted to the floor for ultimate stability, which is highly recommended for serious lifters or those performing dynamic movements like kipping pull-ups. Freestanding racks rely on their footprint and weight for stability.
Essential Features and Desirable Add-ons
Beyond basic construction, specific features enhance usability, safety, and versatility.
- J-Hooks: These cradle the barbell. Look for J-hooks with a UHMW (Ultra High Molecular Weight polyethylene) plastic lining. This protective layer prevents scratching and premature wear on your barbell’s knurling.
- Safety Systems:
- Pin-and-Pipe Safeties: Simple, robust, and effective. They consist of a steel pipe that slides through holes and a pin that secures it.
- Strap Safeties: Made of heavy-duty nylon webbing. They are quieter, protect the barbell better if dropped, and absorb impact more gently. Often preferred for Olympic lifting.
- Spotter Arms: Extend out from the rack, providing an external safety catch. Useful for exercises performed outside the main cage.
- Hole Spacing:
- 2-inch spacing: Standard across most racks.
- Westside Hole Spacing: Features 1-inch spacing in the bench press and clean pull zones (typically the lower and middle sections of the uprights). This allows for much finer adjustments, particularly beneficial for bench press setup where small height differences can significantly impact performance and comfort.
- Integrated Pull-Up Bar: A near-universal feature. Look for multi-grip options (different diameters, neutral grips) for varied training.
- Accessory Compatibility: Consider the future. Does the rack support a wide range of attachments (dip bars, landmine, plate storage pins, band pegs, cable systems) that you might want to add later? Check if the brand offers its own ecosystem of attachments, or if it’s compatible with third-party accessories (often dependent on upright size and hole diameter).
Mastering Your Machine: Effective Power Rack Workouts
Owning a power rack is just the beginning; knowing how to utilize it effectively is where the real transformation happens. It’s about understanding proper setup, mastering fundamental movements, and exploring its full range of capabilities.
Setting Up for Success: Safety Bar Placement
Incorrect safety bar placement negates their purpose. Always prioritize this step before loading any significant weight.
- For Squats:
- With an unloaded barbell on your back, squat down to your deepest comfortable position.
- The safety bars should be set just below this lowest point, typically one notch lower.
- If you fail, you should be able to sit the barbell down onto the safeties by simply dropping into your deepest squat. Practice this bail-out with an empty bar to build confidence.
- For Bench Press:
- Lie on the bench with an unloaded barbell.
- Set the safety bars just above your chest, allowing for a full range of motion without hitting them on successful reps.
- If you fail, the bar should rest comfortably on the safeties without pinning you. Ensure enough space to slide out from under the bar if needed.
Fundamental Movements: The Big Lifts
The power rack shines brightest when performing the foundational compound exercises that build overall strength and muscle.
- Squats (Back Squat, Front Squat):
- Setup: Position J-hooks at shoulder height. Ensure your feet are directly under the bar before unracking.
- Form Tip: Maintain a neutral spine, brace your core, and drive through your heels. Keep knees tracking over toes. The safeties provide immense confidence for pushing depth and weight.
- Bench Press:
- Setup: Position J-hooks so the bar is easily un-racked with straight arms, then slightly below that for re-racking. Place the bench centrally within the rack, ensuring your eyes are under the bar. Set safeties as described above.
- Form Tip: Create a slight arch in your lower back, retract your shoulder blades, and drive your feet into the floor. Control the descent, touch your chest lightly, and press back up.
- Overhead Press (Standing):
- Setup: Position J-hooks at upper chest/shoulder height.
- Form Tip: Unrack the bar, take a step back, brace your core, and press directly overhead, allowing your head to slightly move forward as the bar clears. Avoid excessive lean back.
- Rack Pulls/Pin Presses:
- Setup: Set the safety bars to your desired height (e.g., just below the knee for rack pulls, mid-point for pin presses).
- Benefit: These variations allow you to overload specific parts of the lift, breaking through plateaus or focusing on muscular weaknesses without the full range of motion.
Expanding Your Repertoire: Accessory and Bodyweight Work
Leverage your power rack for a diverse range of exercises that complement your main lifts.
- Pull-ups/Chin-ups:
- Variations: Wide grip, neutral grip, close grip (chin-ups).
- Progressions: If you can’t do full reps, use resistance bands for assistance or perform eccentric (lowering phase) only reps.
- Dips (with attachment):
- Form Tip: Keep elbows tucked in for triceps focus; flare them slightly for more chest involvement. Control the descent.
- Band Work:
- Accommodating Resistance: Attach bands from the rack to the barbell for squats or bench press. The resistance increases as you get stronger through the range of motion, challenging your lockout.
- Mobility/Activation: Use bands for warm-up exercises like band pull-aparts or glute activation drills.
- Inverted Rows:
- Setup: Set the safety bars at a comfortable height. Lie underneath, grab the bar, and pull your chest towards it.
- Progression: Adjust foot position (closer to the bar makes it harder), or elevate your feet.
Programming for Progress: Integrating Your Power Rack
A power rack is a tool; a well-structured program is the blueprint for building your desired physique and strength. Whether you’re a beginner or an intermediate lifter, thoughtful programming ensures consistent gains.
Sample Beginner Full-Body Routine (3x Week)
For beginners, a full-body approach three times a week allows for frequent practice of fundamental movements and sufficient recovery. Focus on mastering form before chasing heavy weights.
-
Workout A:
- Back Squats: 3 sets of 5-8 reps
- Bench Press: 3 sets of 5-8 reps
- Barbell Rows (using J-hooks or safeties): 3 sets of 8-12 reps
- Overhead Press: 3 sets of 5-8 reps
- Pull-ups (or assisted): 3 sets to failure/target reps
-
Workout B (Alternate with Workout A):
- Front Squats (or Leg Press if available): 3 sets of 6-10 reps
- Incline Bench Press (if adjustable bench available): 3 sets of 8-12 reps
- Rack Pulls (from just below knee): 3 sets of 5-8 reps
- Dips (or assisted): 3 sets to failure/target reps
- Hanging Leg Raises: 3 sets of 10-15 reps
-
Focus: Consistency, perfect form, and slow, steady weight increases. Rest 60-90 seconds between sets.
Intermediate Split Training (4x Week)
As you gain strength and experience, you might opt for a split routine to allow for more volume and specific muscle group focus.
- Day 1: Upper Body Push
- Bench Press: 3-4 sets of 5-8 reps
- Overhead Press: 3-4 sets of 6-10 reps
- Incline Dumbbell Press (if dumbbells available): 3 sets of 8-12 reps
- Tricep Pushdowns (if cable attachment): 3 sets of 10-15 reps
- Dips: 3 sets to failure
- Day 2: Lower Body & Core
- Back Squats: 3-4 sets of 5-8 reps
- Romanian Deadlifts (RDLs) or Good Mornings: 3 sets of 8-12 reps
- Lunges (barbell or dumbbell): 3 sets of 10-12 reps per leg
- Calf Raises (standing with barbell): 3 sets of 15-20 reps
- Plank: 3 sets, hold for 30-60 seconds
- Day 3: Rest/Active Recovery
- Day 4: Upper Body Pull
- Rack Pulls (from mid-shin): 3-4 sets of 4-6 reps
- Pull-ups (weighted if possible): 3-4 sets to failure/target reps
- Barbell Rows: 3 sets of 8-12 reps
- Face Pulls (if cable attachment): 3 sets of 12-15 reps
- Bicep Curls (barbell or dumbbell): 3 sets of 10-15 reps
- Day 5: Full Body/Accessory
- Front Squats: 3 sets of 6-10 reps
- Pin Press (targeting sticking point): 3 sets of 5-8 reps
- Inverted Rows: 3 sets of 10-15 reps
- Farmer’s Walks (if space/equipment): 3 sets for distance/time
- Focus: Increased volume, slightly longer rest periods (90-120 seconds for compound lifts), and strategic use of accessory movements to target weaknesses.
The Principle of Progressive Overload
Regardless of your routine, continuous progress hinges on progressive overload. Track your workouts diligently to ensure you are consistently challenging yourself.
- Increase Weight: The most straightforward method. Once you can comfortably hit the top end of your rep range for all sets, increase the weight slightly (e.g., 2.5-5 lbs).
- Increase Reps/Sets: If you can’t increase weight, try adding more repetitions within your target range, or add an extra set.
- Decrease Rest Time: Shortening the rest periods between sets can increase the intensity of your workout.
- Improve Form: While not directly "overload," perfecting your technique allows you to lift more efficiently and safely, often leading to natural strength increases.
- More Challenging Variations: Progress from easier exercises to harder ones (e.g., assisted pull-ups to unassisted, then weighted pull-ups).
Maintenance and Longevity: Keeping Your Rack Ready
Your power rack is a durable piece of equipment, but a little care goes a long way in ensuring its longevity and continued safe operation.
- Regular Checks: Periodically inspect all bolts, nuts, and attachment points. Tighten any that have come loose from vibrations during use.
- Cleanliness: Wipe down the steel frame with a damp cloth to remove sweat and dust. If you have plastic liners on J-hooks, ensure they are clean and free of debris.
- Lubrication (if applicable): If your rack has moving parts like a cable pulley system, apply a light lubricant as recommended by the manufacturer.
- Floor Protection: If your rack is not bolted down, use rubber mats or horse stall mats under its feet to protect your flooring and provide additional stability and sound dampening.
Conclusion
The power rack stands as a testament to efficient, effective, and safe strength training in the comfort of your own home. It’s more than just a collection of steel; it’s an investment in your physical and mental well-being, offering the freedom to pursue your fitness aspirations on your terms.
By understanding its versatility, selecting a model that fits your needs, mastering fundamental movements, and applying the principles of progressive overload, you unlock an unparalleled training experience. Embrace the process, commit to consistency, and let your power rack be the sturdy foundation upon which you build a stronger, more resilient, and healthier you. The journey to peak performance is not just about the weights you lift, but the fortitude you forge with every rep. Step into your rack, seize the bar, and unleash your power.