In the relentless pursuit of physical strength and enduring health, many of us dream of a dedicated space where we can push our limits, free from the constraints of gym memberships, crowded equipment, or judgmental eyes. This aspiration often leads to the creation of a home gym – a personal sanctuary where sweat and determination forge resilience. At the heart of many effective home gyms, especially for those serious about progressive strength training, lies an indispensable piece of equipment: the power rack.
Often perceived as a tool for elite powerlifters, the power rack is, in fact, a remarkably versatile and safe foundation for anyone – from the absolute beginner taking their first steps into weightlifting to the intermediate enthusiast striving for new personal bests. It’s more than just a metal cage; it’s a commitment to your fitness journey, a guarantee of safety, and a gateway to a comprehensive strength regimen. This article will demystify the power rack, guiding you through its benefits, how to select the perfect one for your space and goals, and most importantly, how to leverage its full potential to build a stronger, more capable you.
Unlocking Your Potential: What is a Power Rack?
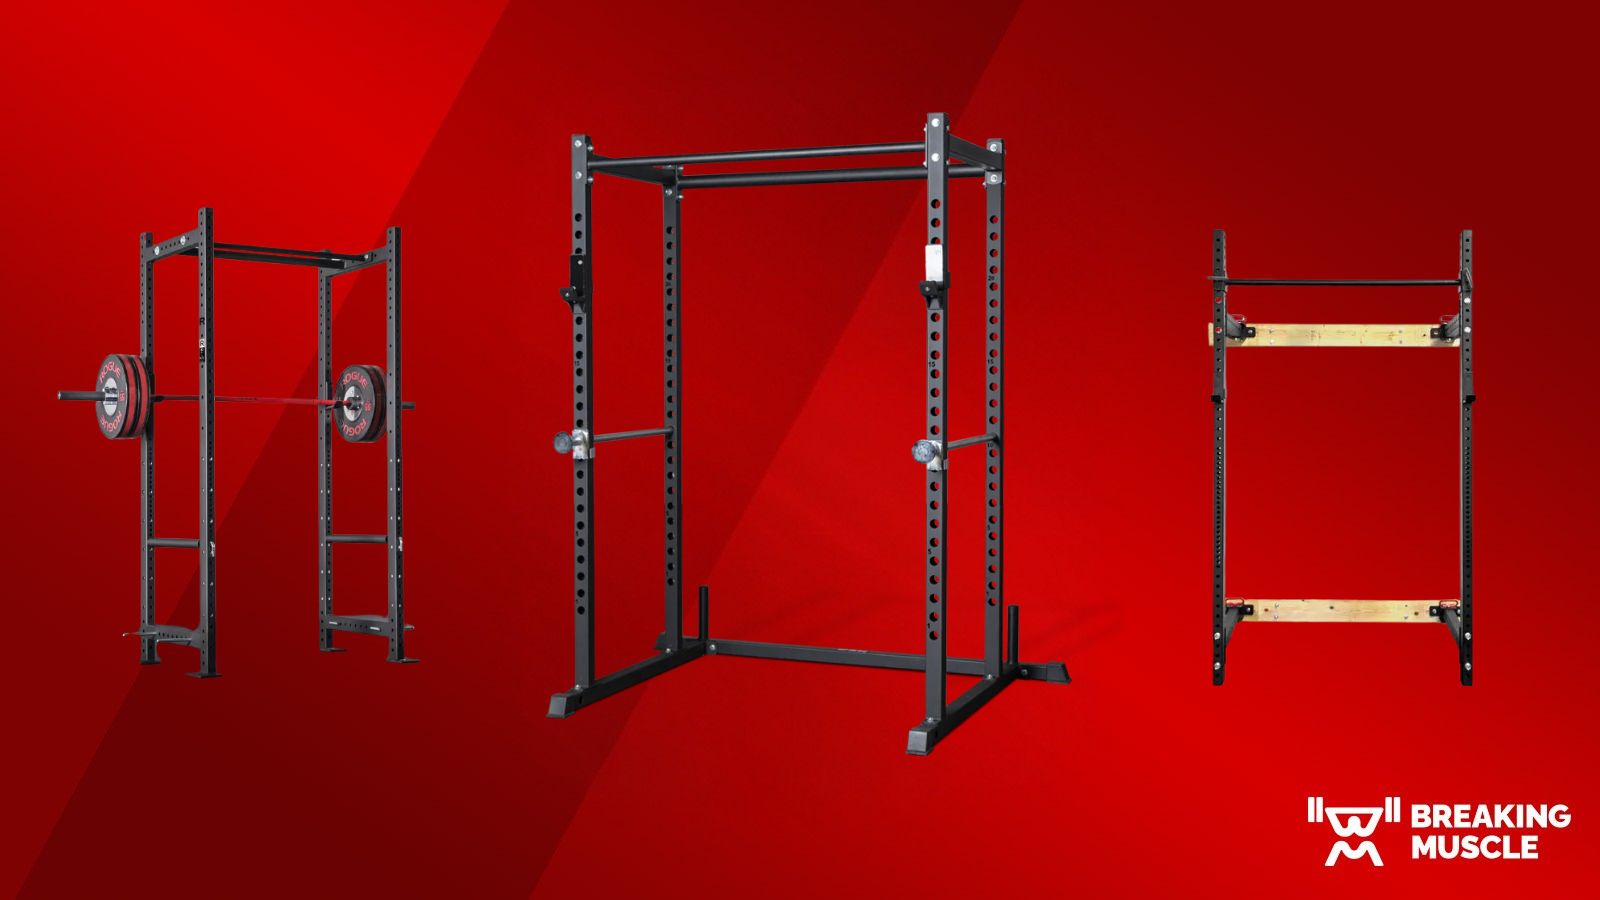
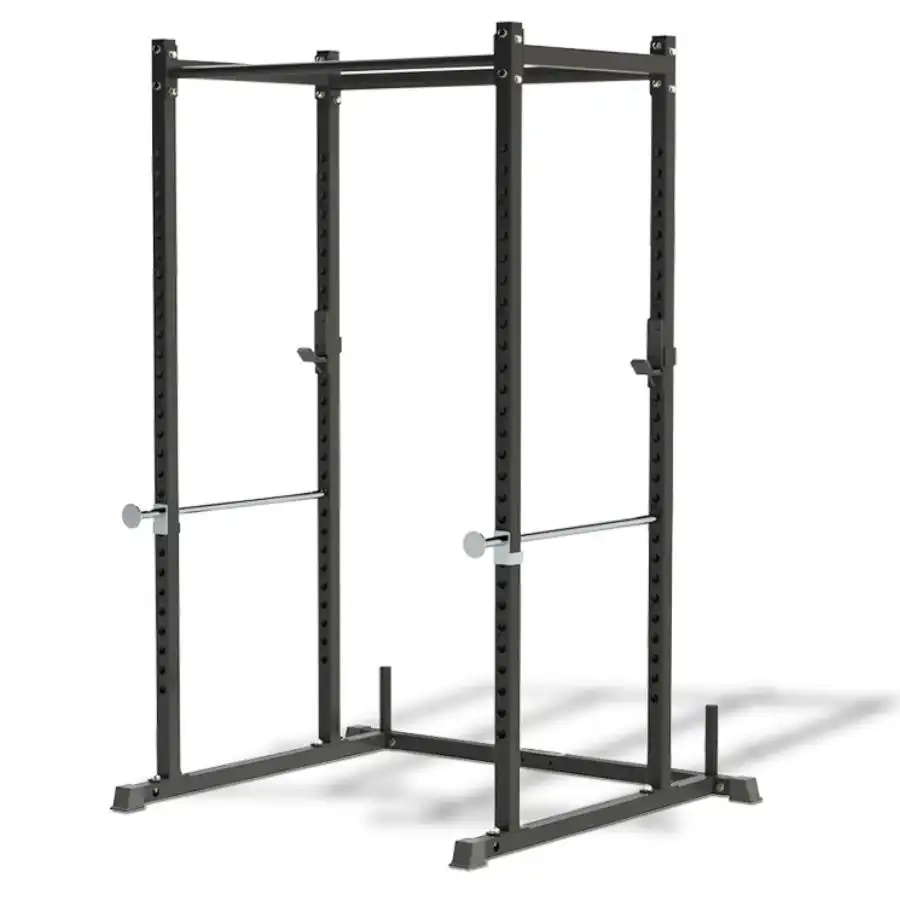
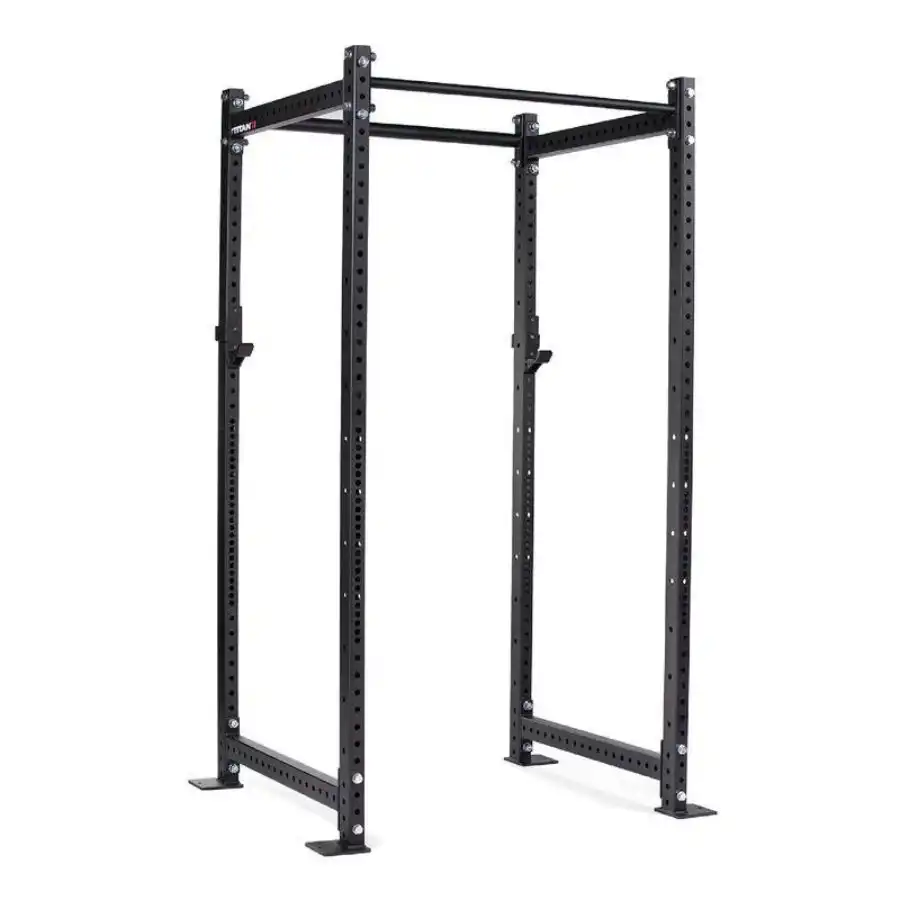
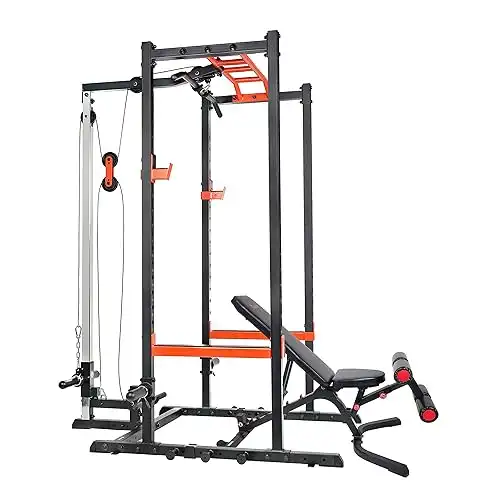
At its core, a power rack, also frequently called a power cage, is a robust, four-post (or sometimes six-post) steel frame designed to enclose an individual and a barbell. Its primary function is to provide a safe and stable environment for performing compound barbell exercises like squats, bench presses, and overhead presses, particularly when lifting heavy weights without a spotter.
The defining feature of a power rack is its integrated safety system. This typically includes adjustable horizontal safety pins, straps, or arms that can be set at various heights within the cage. Should you fail a lift – meaning you can no longer complete the repetition – you can safely lower the barbell onto these safeties, preventing injury and allowing you to bail out without risk. This peace of mind is invaluable, empowering you to challenge yourself and push your limits without fear.
While full power racks offer a completely enclosed lifting space, some variations exist. Half racks, for instance, typically feature two uprights and an open front, still providing excellent support and safety for many exercises but with a slightly smaller footprint. For the purposes of this guide, we’ll primarily focus on the comprehensive capabilities of a full power rack, which offers maximum versatility and safety for a home gym setup.
Why a Power Rack is a Game Changer for Your Home Gym
Investing in a power rack for your home gym is more than just buying equipment; it’s investing in your long-term fitness success and convenience. Here’s why it stands out as a foundational piece:
1. Unparalleled Safety and Confidence
This is arguably the most significant advantage. Lifting heavy weights carries inherent risks, especially when training alone. The adjustable safety mechanisms within a power rack act as a built-in spotter, catching the bar if you fail a lift. This allows you to train to muscular failure safely, which is crucial for stimulating muscle growth and strength gains. For beginners, it builds confidence to attempt challenging lifts, knowing there’s a safety net. For intermediates, it allows them to push past plateaus without needing a workout partner every session.
2. Versatility Beyond Expectation
While synonymous with squats and bench presses, a power rack transforms into a multi-functional training station with the right accessories. Most racks come with or are compatible with:
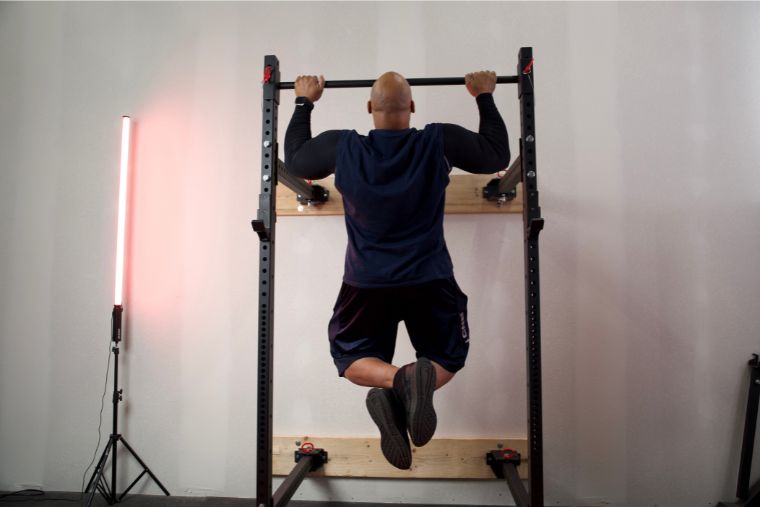
- Pull-up bars: Essential for back and arm development, often integrated into the top cross-members.
- Dip stations: Attachments that allow for bodyweight dips, targeting chest, triceps, and shoulders.
- Landmine attachments: Pivot points for dynamic, rotational exercises, rows, and presses.
- Resistance band pegs: For adding accommodating resistance, making lifts harder at the top, or assisting with bodyweight exercises.
- Lat pulldown/cable row attachments: Some racks integrate full cable systems, turning them into a complete gym.
This versatility means you can perform a full-body workout covering all major muscle groups, making the most of your investment and limited space.
3. Enabling Progressive Overload
Progressive overload – continually increasing the demands on your muscles – is the fundamental principle of strength training. A power rack facilitates this by allowing you to safely load significant weight onto a barbell and perform the foundational movements necessary for strength gains. As you get stronger, you can confidently add more weight, knowing the safety system has your back.
4. Convenience and Consistency
No more waiting for equipment, driving to the gym, or adhering to strict operating hours. Your power rack is always available, fitting into your schedule, whether that’s an early morning session before work or a late-night lift. This convenience drastically increases the likelihood of consistent training, which is the cornerstone of any successful fitness journey.
5. Long-Term Health Benefits
Research consistently links regular strength training to a myriad of long-term health benefits, including increased bone density, improved metabolism, better cardiovascular health, enhanced mood, and reduced risk of chronic diseases. A power rack provides the means to engage in this vital form of exercise effectively and sustainably from your home.
Choosing Your Power Rack: A Strategic Investment
Selecting the right power rack is a crucial step in building your home gym. It’s a significant investment, so careful consideration of your space, budget, and fitness goals is essential.
1. Assess Your Space: The Foundation of Your Choice
Before anything else, measure your available space meticulously. This includes:
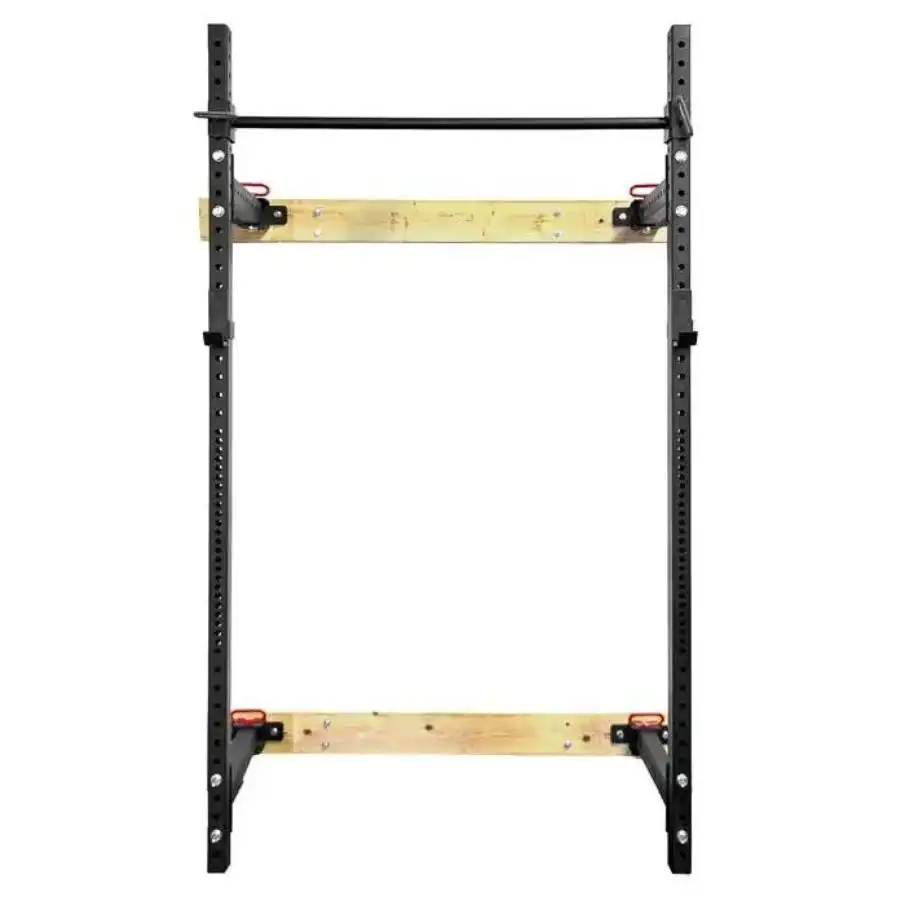
- Ceiling Height: Power racks typically range from 72 inches (6 feet) to over 90 inches (7.5 feet) tall. If you’re in a basement or a room with a low ceiling, a "short" rack is a necessity. Remember to account for overhead clearance needed for exercises like overhead presses, pull-ups, and even just racking the bar.
- Footprint (Length x Width): Racks vary in depth and width. Ensure you have enough floor space, not just for the rack itself, but also for comfortable movement around it. You’ll need space in front and behind for loading plates, performing deadlifts, or setting up a bench. Allow at least 2-3 feet of clear space around the rack for safety and maneuverability.
- Folding vs. Fixed: If space is extremely limited, a wall-mounted folding power rack can be a game-changer. These designs allow you to fold the uprights inward or outward against the wall when not in use, reducing their projection from the wall to as little as five inches. This is ideal for multi-purpose spaces like garages.
2. Understand Construction & Durability: Built to Last
The integrity of your power rack hinges on its construction materials and design.
- Steel Gauge: This refers to the thickness of the steel tubing. Lower gauge numbers indicate thicker, stronger steel.
- 11-gauge steel: Considered heavy-duty, ideal for serious lifters, high weight capacities, and commercial settings. It offers superior stability and longevity.
- 12-gauge steel: A solid choice for most home gym users, offering a good balance of strength and cost.
- 14-gauge steel: Common in more budget-friendly or entry-level racks. It’s suitable for beginners and intermediate lifters who won’t be pushing extreme weights. While less sturdy than 11-gauge, it can still provide a safe and effective workout environment.
- Tubing Size: Common sizes are 2×2 inches, 2×3 inches, or 3×3 inches. Thicker tubing (e.g., 3×3 inches) generally means a more rigid and stable rack, often found on higher-end models.
- Stability: Look for features that enhance stability, such as bolt-down options (if you can permanently fix it to your floor), wide base designs, and weight storage pegs on the rear base, which add ballast when loaded with plates.
3. Weight Capacity – Match Your Ambition
Every power rack has a stated maximum weight capacity.
- Rackable Capacity: This refers to the weight the J-cups and safety systems can safely hold.
- Pull-up Bar Capacity: Often a separate, lower rating.
For beginners, a rack with a 700-pound capacity is usually more than sufficient. Intermediate lifters pushing heavier weights might look for capacities of 800-1,100 pounds or more. Always consider your current strength levels and your projected strength growth. It’s wise to "future-proof" your purchase to some extent, so you don’t quickly outgrow your equipment. Always respect the stated limits of the rack and its attachments.
4. Essential Features & Customization: Tailoring to Your Needs
Beyond the basic frame, several features and potential attachments can significantly enhance your rack’s utility:
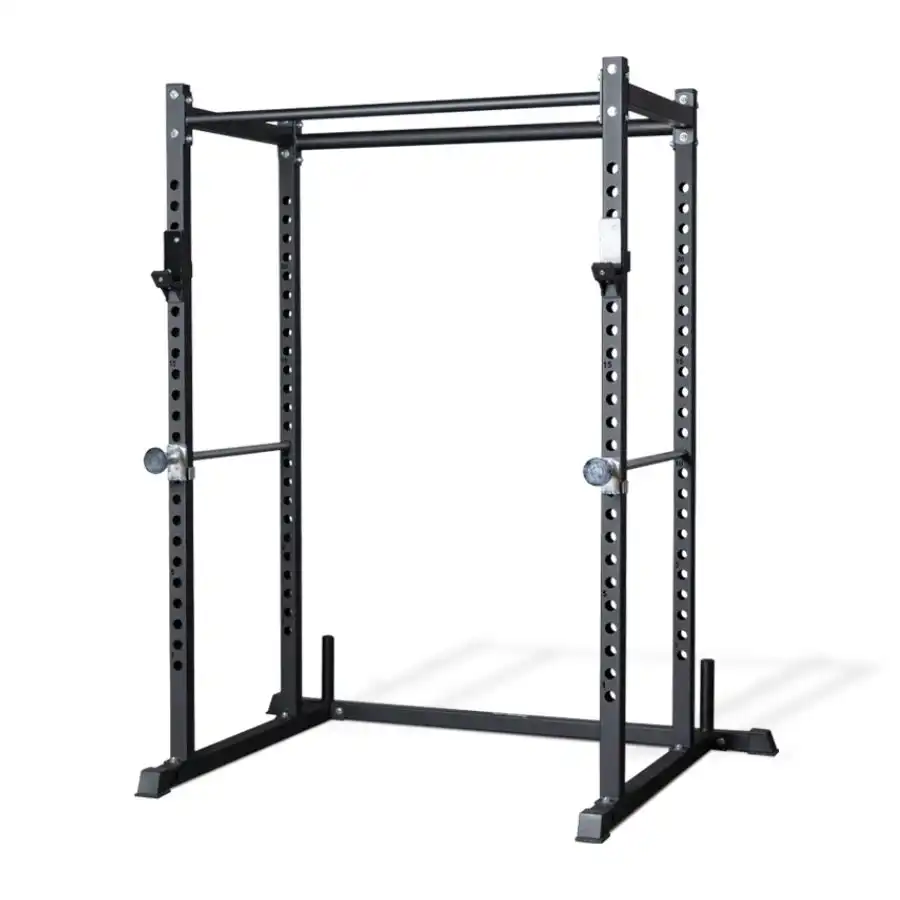
- J-Cups/J-Hooks: These hold the barbell. Prioritize J-cups with plastic (UHMW) or rubber lining to protect your barbell’s knurling (the textured grip) and the rack’s finish.
- Safety Systems:
- Pin-Pipe Safeties: Traditional, robust, and generally budget-friendly. They consist of a solid pin that slides through the uprights, supporting a pipe.
- Strap Safeties: Made of heavy-duty nylon, these are excellent for protecting your barbell’s finish, absorbing impact more softly, and can be quieter. They are often preferred for Olympic lifting.
- Spotter Arms: Extend out from the front of the rack, offering external safety for certain lifts, particularly if you prefer lifting outside the main cage.
- Hole Spacing: The distance between the adjustment holes on the uprights.
- 2-inch spacing: Standard, adequate for most lifts.
- 1-inch or "Westside" spacing: Offers finer adjustments, particularly valuable in the bench press and clean pull zones, allowing you to dial in the perfect bar height for optimal setup and safety.
- Integrated Pull-Up Bar: Most racks include one. Look for options with different grip diameters (1.25-inch standard, 2-inch for grip strength) and multiple grip positions (wide, neutral, close-grip) for varied back and arm training.
- Accessory Compatibility: Consider the ecosystem of attachments available. Can you add a dip station, a multi-grip pull-up bar, a landmine attachment, plate storage, or a lat pulldown system later? Ensure the rack’s upright dimensions and hole sizes are compatible with the accessories you might want to add.
5. Budgeting for Your Strength Sanctuary
Power racks range widely in price, from entry-level options around $300-$500 to premium, fully loaded systems costing $1,000 or more.
- Entry-Level: Often 14-gauge steel, basic J-cups and pin-pipe safeties, suitable for beginners.
- Mid-Range: 12- or 11-gauge steel, better J-cups, strap safeties often an option, more accessory compatibility.
- High-End: Heavy-duty 11-gauge steel, extensive accessory ecosystems, fine hole spacing, superior finishes, and higher weight capacities.
Consider what’s included in the base price (J-cups, safeties, pull-up bar) and what you might need to purchase separately. Factor in potential shipping costs as well. Sometimes, a slightly higher initial investment in a more robust rack with better features can save you money and headaches in the long run.
Mastering Your Power Rack: Workouts for Every Level
Once your power rack is set up, it’s time to put it to work. The key to successful strength training is consistency, proper form, and progressive overload.
1. Fundamental Movements: The Core of Your Training
These exercises form the backbone of any effective strength program and are perfectly suited for the power rack.
-
Barbell Squats (Back Squat, Front Squat):
- Actionable Advice: Set your safety bars to the correct height. A great tip is to place an unloaded bar on your back, squat to your deepest comfortable position, and then set the safeties about 1-1.5 inches below that point. This ensures that if you fail, you can simply sit down onto the safeties. Focus on keeping your chest up and core tight.
- Real-Life Example: Imagine you’re aiming for a new personal best on your back squat. With the safeties correctly set, you can push with full intensity, knowing that if the weight becomes too much, you can lean forward slightly and let the bar rest on the pins, rather than risking injury.
-
Barbell Bench Press:
- Actionable Advice: Position your adjustable weight bench inside the rack. Set the safeties just above your chest, at a height where the barbell would touch them if you couldn’t complete a rep, but not so high that they interfere with your full range of motion. Ensure your wrists are straight, elbows slightly tucked, and feet are planted for stability.
- Real-Life Example: A beginner might be hesitant to try a heavier bench press without a spotter. The power rack allows them to confidently load the bar, knowing that if they get stuck at the bottom, the safeties will prevent the bar from pinning them.
-
Barbell Overhead Press (Standing or Seated):
- Actionable Advice: Set the J-hooks at shoulder height for easy un-racking. For standing presses, ensure you have ample ceiling clearance. For seated presses, a weight bench with a back support is ideal. Keep your core braced and avoid excessive arching in your lower back.
- Real-Life Example: As you progress, you’ll find that your overhead press benefits from being able to safely un-rack and re-rack heavy weights, allowing you to focus purely on the lift itself.
-
Rack Pulls:
- Actionable Advice: These are partial deadlifts where the barbell starts elevated on the safety pins, typically from just below or above the knees. This variation allows you to lift heavier loads than a full deadlift, strengthening your lockout and upper back. It’s an excellent way to introduce yourself to heavier lifting without the full range of motion demands of a conventional deadlift, or to work through sticking points.
- Real-Life Example: An intermediate lifter struggling with the top portion of their deadlift can use rack pulls to specifically strengthen that range of motion, translating to a stronger full deadlift.
2. Expanding Your Routine with Accessories: Full-Body Development
Leverage your rack’s versatility with attachments to target different muscle groups:
-
Pull-ups/Chin-ups:
- Actionable Advice: Use the integrated pull-up bar. Vary your grip (wide, neutral, close, underhand) to emphasize different muscles in your back and arms. Beginners can use resistance bands looped over the bar for assistance.
- Real-Life Example: If you’re just starting, hang from the bar for as long as possible to build grip strength, then progress to assisted pull-ups.
-
Dips:
- Actionable Advice: If you have a dip attachment, use it to target your chest, shoulders, and triceps. Control the movement, lowering until your shoulders are below your elbows (if comfortable), and pressing back up.
- Real-Life Example: Dips are fantastic for building upper body pushing strength, complementing your bench press.
-
Lat Pulldowns/Cable Rows (with attachment):
- Actionable Advice: If your rack has a cable system, utilize it for isolated back work. Lat pulldowns target the lats, while cable rows build thickness in the mid-back. Maintain good posture and focus on squeezing the target muscles.
- Real-Life Example: After heavy barbell rows, finishing with some controlled cable rows can provide a deep, muscle-building pump without further taxing your lower back.
-
Resistance Band Work:
- Actionable Advice: Attach resistance bands to the pegs on your rack for dynamic resistance during squats or deadlifts, or for isolation exercises like band pull-aparts or banded good mornings.
- Real-Life Example: Adding bands to squats makes the lift harder at the top, helping to build explosive power and overcome sticking points.
3. The Power of Progressive Overload: Continuous Growth
Remember Shane Sevcik’s advice: "It’s all about consistency. Make sure you have some kind of progressive overload built into your programming."
- Actionable Advice: To progressively overload, you can:
- Increase the weight.
- Increase repetitions with the same weight.
- Increase sets.
- Decrease rest time between sets.
- Improve form and control.
- Increase training frequency.
- Real-Life Example: If you successfully complete 3 sets of 8 reps on squats with 135 lbs, aim for 3 sets of 9 reps next week, or increase the weight to 140 lbs for 3 sets of 8. Small, consistent increases lead to significant gains over time.
4. Safety Protocols: Non-Negotiable
Reiterate the critical importance of safety:
- Set Safeties Correctly: As Sevcik emphasizes, this is paramount. For squats, safeties should be 1-1.5 inches below your deepest squat. For bench press, just above your chest. Never use the rack as "a big immobile squat stand" without setting the safeties.
- Warm-up Thoroughly: Prepare your body with dynamic stretches and light cardio before lifting.
- Prioritize Form: Never sacrifice good form for heavier weight. Watch instructional videos, record yourself, or consult a fitness professional if unsure.
- Listen to Your Body: Don’t push through sharp pain. Rest and recovery are as important as the workout itself.
Beyond the Basics: Elevating Your Training
Once you’re comfortable with the fundamentals, your power rack can support more advanced training methodologies:
Smart Accessory Integration
As your goals evolve, consider specific attachments. A dedicated landmine attachment can introduce rotational power and core stability work. A multi-grip pull-up bar can offer even more variety for back development. Plate storage pins keep your weights organized and add stability to the rack.
Programming for Success
For beginners, a full-body workout 2-3 times a week is excellent. Intermediate lifters might move to a split routine (e.g., upper/lower, push/pull/legs). Your power rack supports all these approaches.
- Beginner Full-Body Example:
- Barbell Squats: 3 sets of 8-12 reps
- Barbell Bench Press: 3 sets of 8-12 reps
- Barbell Rows (using J-hooks for rack pull start): 3 sets of 8-12 reps
- Overhead Press: 3 sets of 8-12 reps
- Pull-ups (assisted if needed): 3 sets to failure
- Intermediate Upper/Lower Split Example (Upper Day):
- Barbell Bench Press: 4 sets of 6-10 reps
- Overhead Press: 3 sets of 8-12 reps
- Pull-ups (weighted if possible): 3 sets of 6-10 reps
- Barbell Rows: 3 sets of 8-12 reps
- Dips: 3 sets to failure
Mind-Muscle Connection
Focus on the muscles working during each exercise. Consciously contract them. This enhances activation and can lead to more effective training, especially as you become more experienced.
Maintenance and Longevity
To ensure your power rack remains a safe and reliable cornerstone of your home gym for years to come, regular maintenance is key:
- Inspect Regularly: Check all bolts, nuts, and welds for tightness and integrity.
- Clean Surfaces: Wipe down the rack periodically to remove dust, sweat, and chalk buildup.
- Lubricate Moving Parts: If your rack has a pulley system or other moving components, lubricate them according to manufacturer instructions.
- Protect Your Floor: Use heavy-duty rubber mats under your rack to protect your flooring and absorb some impact and noise.
Conclusion: Forge Your Strength, Own Your Journey
The power rack is more than just a piece of fitness equipment; it’s an empowering statement. It declares your commitment to personal strength, health, and the unwavering pursuit of self-improvement. For beginners, it provides a safe and encouraging environment to learn the fundamental movements of strength training. For intermediate enthusiasts, it offers the robustness and versatility needed to break through plateaus and explore new dimensions of physical capability.
Research consistently highlights the profound benefits of muscle-strengthening exercises – a commitment of just 30 to 60 minutes a week can significantly enhance your health and well-being. With a power rack in your home, you eliminate excuses and embrace convenience, making consistent, effective workouts an integral part of your life.
This is your journey. This is your space. Step into your power rack, set your intentions, and forge the strength, resilience, and confidence that will transform not just your body, but your entire life. The blueprint is laid out; now it’s time to build.