The pursuit of strength, resilience, and a healthier lifestyle often begins with a single step – or in the world of fitness, a single lift. For many, the dream of a fully equipped home gym remains just that: a dream. However, one piece of equipment stands out as the cornerstone of any serious strength training setup, transforming a mere space into a powerhouse of potential: the power rack.
Often overlooked or misunderstood by those new to the iron game, a power rack is more than just a metal cage. It’s a sanctuary for safe, progressive, and highly effective strength training. Whether you’re taking your first tentative steps into lifting or you’re an intermediate enthusiast looking to push your limits, understanding how to choose, set up, and utilize a power rack can be the catalyst for unlocking unprecedented gains and maintaining unwavering consistency.
This guide is designed to demystify the power rack, offering a professional, motivational, and authoritative roadmap for beginners to intermediate fitness enthusiasts. We’ll delve into everything from the fundamental mechanics of a power rack to advanced training techniques, ensuring you have all the knowledge and actionable advice to confidently integrate this essential tool into your fitness journey. Prepare to transform your home gym into a hub of strength and empower yourself to reach new heights.

What Exactly is a Power Rack?
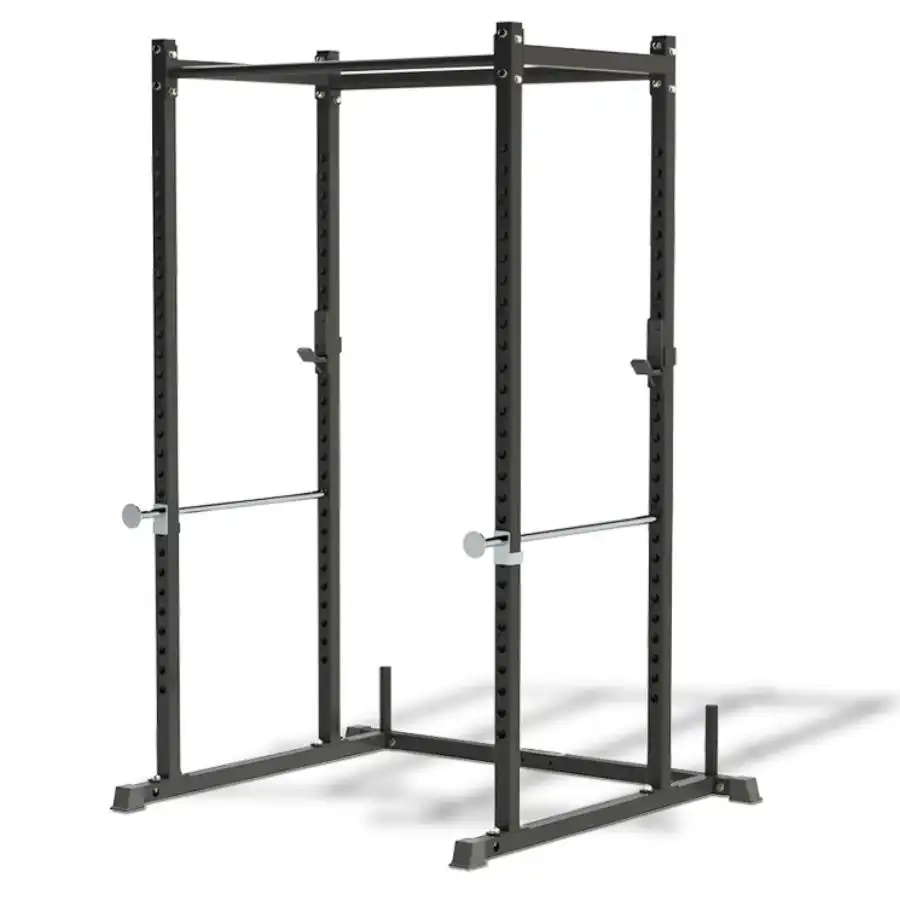
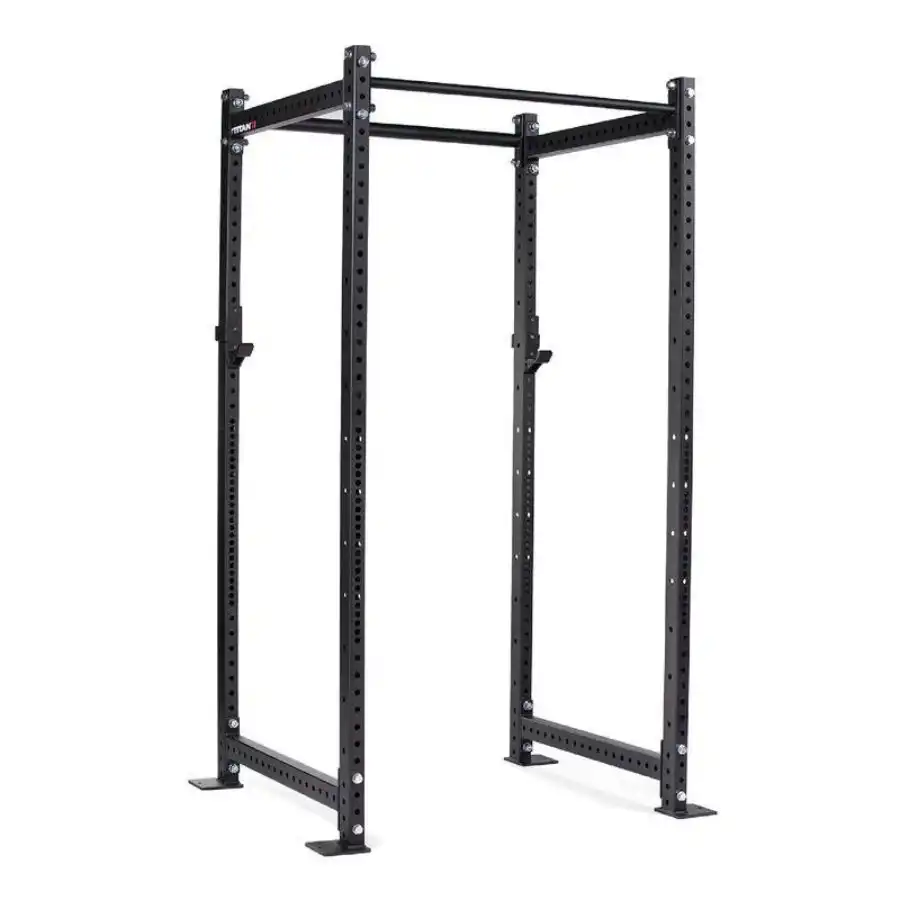
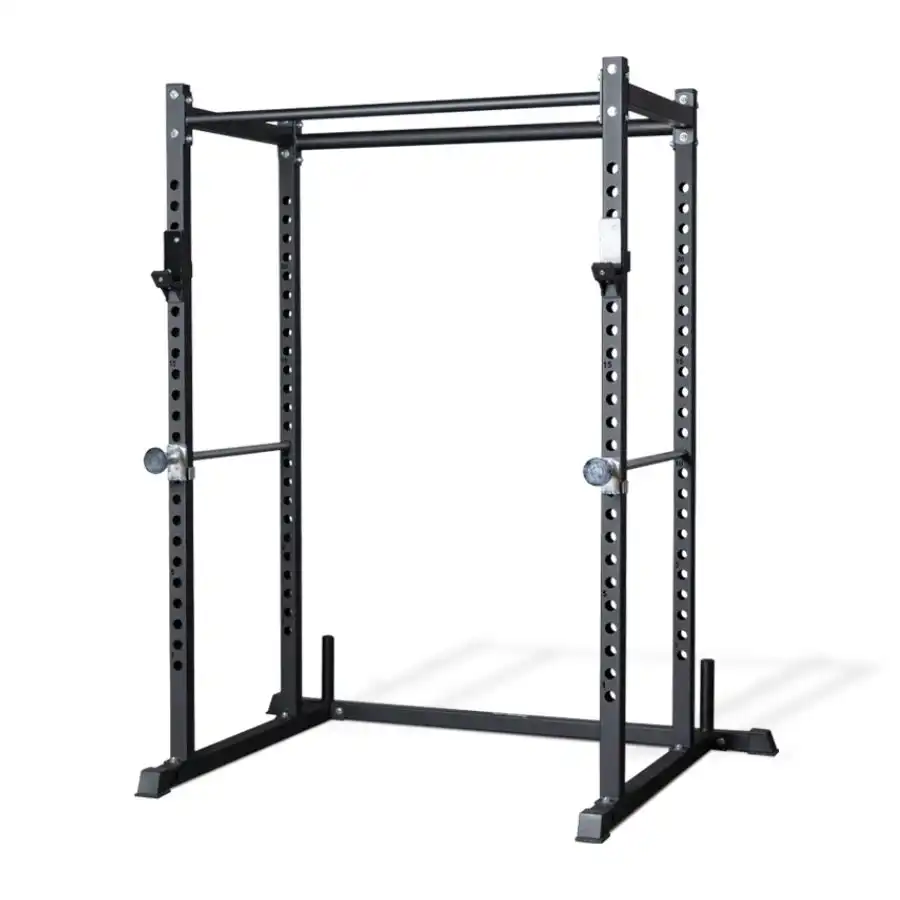
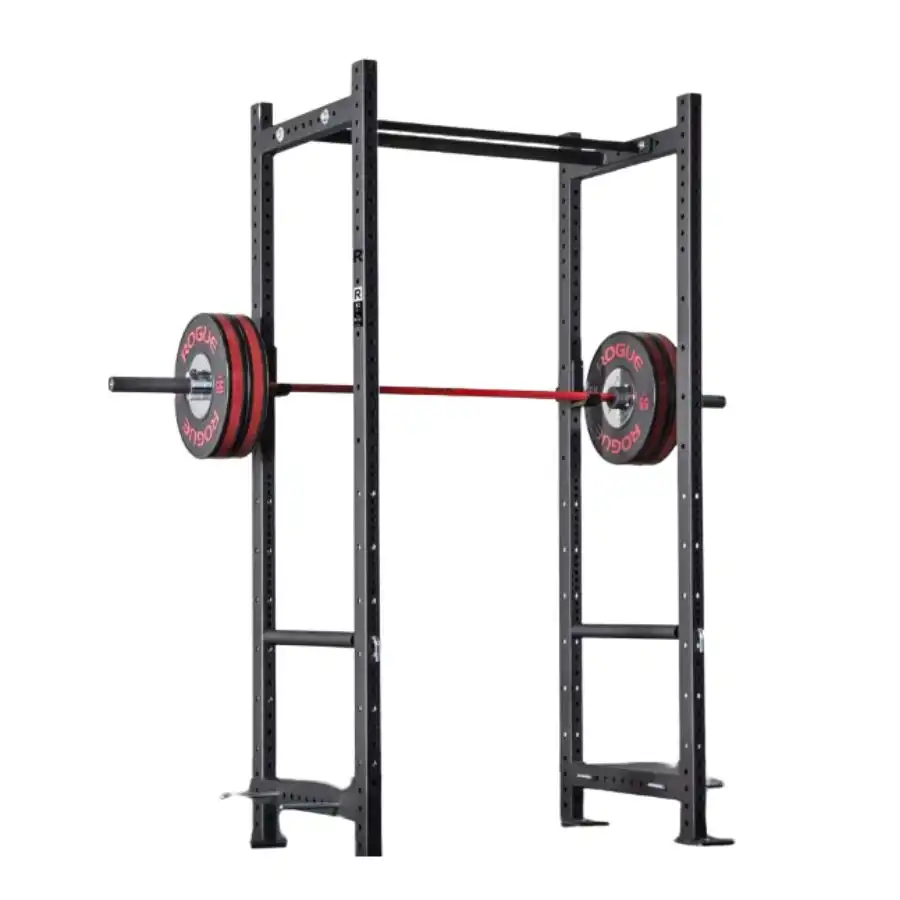
At its core, a power rack, often interchangeably called a power cage, is a robust, four-post steel structure designed to facilitate safe and effective barbell exercises. Imagine a sturdy metal box with vertical uprights, interconnected by horizontal crossmembers. These uprights feature a series of evenly spaced holes, allowing you to precisely adjust the height of J-hooks (to hold your barbell) and safety mechanisms (like pins, straps, or arms).
The primary purpose of this enclosed structure is safety. It acts as a mechanical spotter, preventing a dropped barbell from crushing you during exercises like squats, bench presses, or overhead presses. Unlike a simple squat stand, which typically features only two uprights and minimal safety, a full power rack provides a secure environment for lifting heavy weights, especially when training alone. Its depth allows you to perform lifts inside the cage, maximizing the protective benefits of its safety features. Some variations, known as half racks, offer a more compact footprint with two uprights, though they generally require lifting outside the immediate frame.
Why Invest in a Power Rack for Your Home Gym?
For anyone serious about strength training at home, a power rack isn’t just a convenience; it’s a fundamental investment in safety, versatility, and long-term progress. Here’s why it’s a game-changer:
- Unparalleled Safety: This is the most compelling reason. The adjustable safety bars, pins, or straps act as a reliable backup, catching the barbell if you fail a lift. This eliminates the need for a human spotter, allowing you to push your limits with confidence, even when training solo. This peace of mind is invaluable, especially when attempting new personal records.
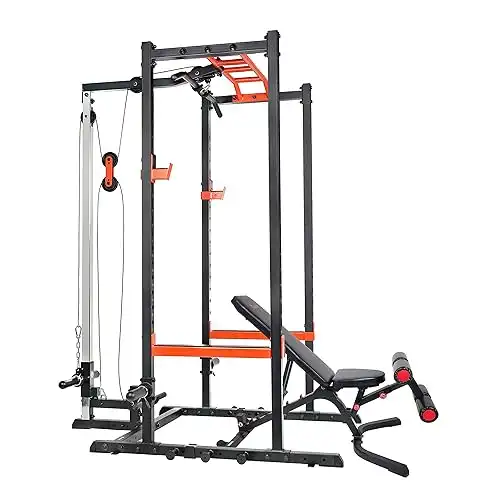
- Ultimate Versatility: A power rack is a multi-functional hub. Beyond the foundational barbell exercises like squats, bench presses, and overhead presses, it can host a myriad of other movements. Many racks come with or can be outfitted with pull-up bars, dip stations, landmine attachments, resistance band pegs, and even cable pulley systems, enabling a full-body workout within a compact footprint.
- Facilitates Progressive Overload: The core principle of strength building is progressive overload – consistently challenging your muscles with increasing resistance. A power rack allows you to safely load significant weight onto a barbell and incrementally increase that load over time, ensuring continuous adaptation and growth.
- Space Efficiency for Comprehensive Training: While it occupies a dedicated space, a power rack consolidates many training options into one area. Instead of needing separate equipment for squats, benching, pull-ups, and more, the rack serves as a central station, making it highly efficient for home gym setups where space might be a premium.
- Long-Term Health Benefits: Regular strength training, facilitated by a power rack, is linked to numerous health advantages, including increased bone density, improved metabolism, better joint health, and a reduced risk of chronic diseases. It’s an investment in not just your fitness, but your overall well-being.
- Consistency and Convenience: Having a dedicated, safe training station at home removes common barriers to exercise, such as travel time to a commercial gym or waiting for equipment. This convenience fosters greater consistency, which is key to achieving lasting fitness results.
Key Considerations When Choosing Your Power Rack
Selecting the right power rack is crucial for ensuring it meets your current needs and future aspirations. It’s not just about finding the "best" rack, but the "best" rack for you. Here’s what to consider:
Space and Dimensions
Before you even begin browsing, meticulously measure your designated workout area. This includes not only the floor space (length and width) but critically, the ceiling height.
- Footprint: Power racks vary in their base dimensions. Consider not just the rack’s footprint, but also the space you’ll need around it to load plates, perform exercises comfortably, and attach accessories.
- Height: Many standard racks are around 90 inches (7.5 feet) tall. If you’re training in a basement or a room with lower ceilings, you’ll need to seek out "short" power rack options, which typically range from 72 to 84 inches. Also, factor in your own height, especially if you plan on using an integrated pull-up bar, to ensure comfortable clearance.
- Depth: The depth of the rack determines how much internal space you have for movement. Deeper racks offer more room but take up more floor space.
- Folding and Retractable Options: For those extremely tight on space, wall-mounted folding or retractable power racks are an ingenious solution. These racks can be folded flat against the wall when not in use, often protruding only a few inches, freeing up valuable floor space for other activities. While convenient, they typically require secure wall mounting.
Weight Capacity and Durability
The structural integrity of your power rack is paramount for safety. This is primarily determined by the gauge of the steel tubing and the overall design.
- Steel Gauge: Steel gauge indicates the thickness of the steel. Lower gauge numbers mean thicker, stronger steel.
- 11-gauge steel: This is considered heavy-duty and is often found in commercial-grade or higher-end home racks. It offers superior strength and stability, ideal for advanced lifters or those planning to lift very heavy.
- 12-gauge steel: A common and robust option for serious home gym users, providing excellent durability for most intermediate to advanced lifters.
- 14-gauge steel: Lighter and more budget-friendly, 14-gauge steel is suitable for beginners and intermediate lifters who may not be pushing extremely heavy weights. It provides adequate stability for general home gym use.
- Some budget racks might even use 16-gauge, which is thinner and generally recommended for lighter loads.
- Rack Weight Capacity: This specifies the maximum weight the entire rack can safely support. Capacities typically range from 700 to 1,100 pounds or more. Even if you’re a beginner, it’s wise to choose a rack with a capacity that exceeds your current lifting maximums, allowing room for growth.
- Accessory Weight Limits: Remember that individual components like J-cups, safety bars, and pull-up bars may have their own, lower weight limits. Always adhere to these for your safety.
Hole Spacing and Adjustability
The spacing of the holes on the uprights dictates how precisely you can adjust the height of your J-hooks and safety features.
- Standard Hole Spacing: Typically two-inch increments along the entire upright. This offers good adjustability for most exercises.
- Westside Hole Spacing: Named after the renowned Westside Barbell Club, this refers to one-inch hole spacing in the critical "bench and clean pull zone" – roughly from chest height down to the floor. This finer spacing allows for extremely precise bar placement for bench presses, rack pulls, and other exercises where even a small adjustment can make a significant difference in comfort and performance. Above and below this zone, spacing often reverts to two inches. For those serious about barbell strength, Westside spacing is a highly desirable feature.
Essential Built-in Features
Certain features are non-negotiable for safety and functionality.
- J-Cups (J-Hooks): These are the hooks that hold your barbell. Look for J-cups with a protective lining (such as UHMW plastic). This lining prevents metal-on-metal contact, protecting the knurling (the textured grip) on your barbell and reducing wear and tear on both the bar and the rack. As competitive weightlifter and coach Shane Sevcik emphasizes, preserving knurling is crucial for maintaining optimal grip, especially for Olympic lifts.
- Safety Pins/Straps/Arms: These are your lifelines.
- Pin-and-Pipe Safeties: Simple, robust, and often found on more budget-friendly racks. They consist of a solid steel pipe that slides through holes in the uprights and is secured by a pin.
- Spotter Arms/Safeties: Often made of solid steel, these extend outwards from the rack. They are very sturdy and can be quick to adjust.
- Safety Straps: These heavy-duty nylon straps connect between two uprights, forming a flexible hammock. They are quieter, can be gentler on your barbell’s knurling, and provide a more forgiving catch than solid steel, which can be beneficial for certain lifts.
- Regardless of the type, ensuring these safeties are included and robust is paramount.
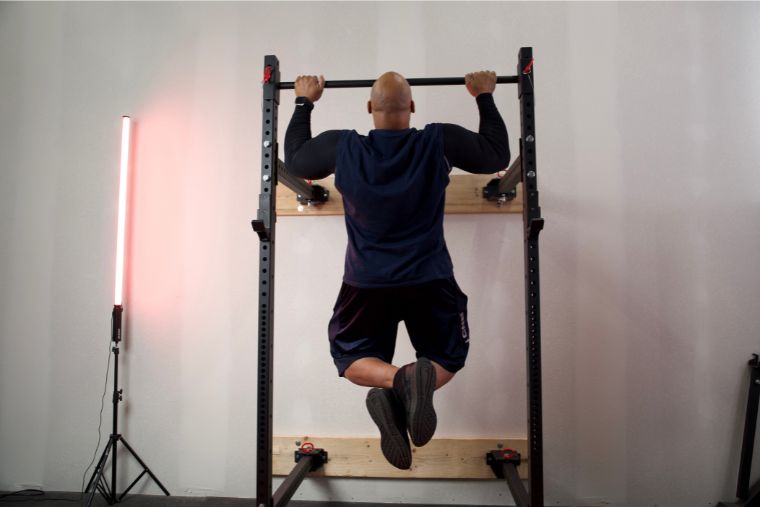
- Integrated Pull-Up Bar: Most power racks include at least one pull-up bar. Some offer multiple grip options (standard 1.25-inch diameter, thicker 2-inch diameter for grip strength, multi-grip options) and adjustable heights. As Sevcik notes, pull-ups are a fundamental movement, and having this built-in maximizes the utility of your rack.
Expandability and Attachments
A truly versatile power rack can grow with your training needs through various attachments.
- Lat Pulldown/Low Row System: Some racks integrate a cable pulley system, allowing you to perform lat pulldowns, low rows, triceps pushdowns, and other cable exercises, adding a new dimension of resistance training.
- Dip Station: Adjustable dip handles can transform your rack into a dedicated station for dips, a powerful exercise for chest, shoulders, and triceps.
- Landmine Attachment: This swiveling attachment allows for a unique range of exercises like landmine presses, rows, rotations, and squats, engaging your core and targeting muscles from different angles.
- Weight Plate Storage: Built-in weight horns or pegs on the back of the rack provide convenient and stable storage for your weight plates, keeping your gym tidy and adding to the rack’s overall stability.
- Resistance Band Pegs: Small pins extending from the base or top of the rack allow you to attach resistance bands for accommodating resistance (adding tension throughout the lift) or specific band-only exercises.
Cost
Power racks range widely in price, typically from $300 to over $1,000, not including accessories.
- Budget-Friendly Options: Entry-level racks (often 14-gauge steel, simpler features) can be found for $300-$500, providing a solid foundation for beginners.
- Mid-Range Options: $500-$800 typically gets you thicker steel (12-gauge or 11-gauge), more precise hole spacing, and a good balance of features and quality.
- High-End Options: Racks over $800 often feature heavy-duty 11-gauge steel, advanced manufacturing processes (like laser-cut holes and robot welding), extensive accessory compatibility, and premium finishes.
Consider your budget, but also view it as an investment. A more durable, versatile rack might cost more upfront but will last longer and provide more training options in the long run. Many brands offer free shipping, which can significantly impact the total cost.
Setting Up Your Power Rack for Optimal Performance and Safety
Once you’ve chosen your power rack, proper setup is critical. This isn’t just about assembly; it’s about optimizing it for your safety and training style.
Installation and Anchoring
Most power racks are designed to be freestanding, but many manufacturers recommend anchoring them to the floor for maximum stability, especially if you plan on performing dynamic movements like kipping pull-ups or lifting very heavy weights.
- Manufacturer Instructions: Always follow the manufacturer’s assembly and installation instructions precisely.
- Bolting Down: If anchoring is recommended or desired, you’ll typically use concrete anchors to secure the rack to a concrete slab. This provides the most rigid and stable setup, eliminating any wobble or movement during lifts.
- Stabilizer Feet/Extensions: Some freestanding racks offer optional stabilizer feet or base extensions that increase the footprint and enhance stability without permanent anchoring.
Correct Safety Bar Placement
This is perhaps the single most important aspect of using a power rack safely. Incorrect safety bar placement negates their purpose. As Shane Sevcik emphatically states, "The purpose of those safety arms is to give you a safe way to bail out of a lift. Otherwise, you’re just using a power rack as a big immobile squat stand."
- For Squats:
- Place an unloaded barbell on your back, as if you were about to squat.
- Squat down to your absolute deepest, lowest comfortable position – the point you’d hit if you were to fail.
- The safety bars should be set approximately one to one-and-a-half inches (or one notch) below this lowest point.
- The goal is that if you fail, all you have to do is sit your butt down to the very bottom, and the bar will rest on the safeties, clearing your body.
- For Bench Press:
- Lie on your bench inside the rack with an unloaded barbell.
- Lower the bar to your chest, mimicking your deepest bench press position.
- Set the safety bars approximately one to one-and-a-half inches above your chest.
- This ensures that if you fail, the bar will rest safely on the pins before it touches your chest or neck, giving you room to maneuver out from under it.
- For Overhead Press: Set the safeties slightly below your shoulders when standing fully upright. This prevents the bar from crashing down on you if you lose control.
Always test the safety bar placement with an unloaded bar before attempting heavy weights.
Maintaining Your Rack
Basic maintenance ensures the longevity and safe operation of your power rack.
- Regular Cleaning: Wipe down the frame and accessories periodically to remove chalk, dust, and sweat, preventing corrosion.
- Bolt Check: Periodically inspect all bolts and fasteners to ensure they are tight. Vibration from lifting can sometimes loosen them over time.
- Inspect J-Cups and Safeties: Check the protective lining on your J-cups for wear. Inspect safety pins, straps, or arms for any signs of damage or bending. Replace components as needed.
Unleashing Your Power Rack’s Full Potential: Workout Strategies
A power rack is a versatile tool for a complete strength training regimen. Here’s how to maximize its use for both fundamental and accessory exercises.
Fundamental Barbell Lifts
These are the bedrock of any strength program, and the power rack makes them safer and more effective.
- Barbell Squats: The quintessential leg and core builder. The rack’s safeties allow you to push your limits without fear of getting pinned under the weight. Experiment with high-bar, low-bar, and front squats.
- Bench Press: A powerful upper body exercise for chest, shoulders, and triceps. With correctly set safeties, you can train to failure safely, crucial for muscle growth.
- Overhead Press (Standing/Seated): Builds shoulder and core strength. Performing it within the rack offers confidence, especially when pressing heavier loads overhead.
- Rack Pulls: A partial deadlift performed with the bar starting from the safeties at various heights. This allows you to target specific parts of the deadlift range of motion, overload your back and grip, and work on lockout strength.
- Inverted Rows: Set the barbell low on the J-hooks. Lie underneath and pull your chest to the bar for an excellent bodyweight back exercise.
Bodyweight and Accessory Work
Your power rack is also a fantastic platform for bodyweight and supplemental exercises.
- Pull-Ups and Chin-Ups: Use the integrated pull-up bar to build back and bicep strength. Vary your grip (wide, narrow, neutral) to target different muscle groups.
- Dips: If your rack has a dip attachment, this is an incredible exercise for chest, triceps, and shoulders.
- Leg Raises/Knee Raises: Hang from the pull-up bar and raise your legs or knees for core strengthening.
- Plyometric Jumps: If space and ceiling height allow, box jumps onto a sturdy box can be performed near the rack.
Integrating Advanced Attachments
If your rack is equipped with additional attachments, leverage them for a more comprehensive workout.
- Lat Pulldowns and Cable Rows: Utilize a lat pulldown system for targeted back development. Low rows are excellent for seated horizontal pulling.
- Landmine Exercises: The landmine attachment opens up a new dimension of training. Perform landmine presses (great for shoulders and core), landmine rows, rotational movements (for oblique strength), and even landmine squats for a unique leg stimulus.
- Resistance Band Training: Attach resistance bands to the pegs to add accommodating resistance to your barbell lifts (e.g., band-assisted squats or bench presses) or to perform various band-only exercises like pull-aparts, monster walks, or triceps extensions.
Progressive Overload Principles
Consistency and progressive overload are the keys to long-term gains.
- Increase Weight: The most straightforward method. Gradually add more weight to the bar as you get stronger.
- Increase Reps: Once you can hit your target reps comfortably, add a few more before increasing weight.
- Increase Sets: Add an extra set to your routine.
- Decrease Rest Time: Shorten the rest periods between sets to increase intensity.
- Improve Form: While not "overload" in the traditional sense, perfecting your technique allows you to lift more efficiently and safely, indirectly leading to greater strength.
- Vary Exercises: Periodically change your exercise variations (e.g., sumo deadlifts instead of conventional, incline bench instead of flat) to challenge muscles in new ways.
Common Mistakes to Avoid
Even with the best equipment, improper usage can hinder progress or lead to injury.
- Incorrect Safety Bar Height: As highlighted by Coach Sevcik, setting the safeties too low renders them useless. Always take the time to set them correctly for each exercise.
- Overlooking Rack Stability: Neglecting to anchor a rack that requires it, or choosing a rack that is too light-gauge for your lifting goals, can lead to instability and compromise safety.
- Neglecting Maintenance: Loose bolts, worn J-cup liners, or damaged safety components can lead to equipment failure. Regular checks are essential.
- Not Utilizing Full Versatility: Many users only squat and bench in their rack. Explore the full range of exercises and attachments to get the most out of your investment.
- Rushing Installation: Take your time during assembly. A poorly assembled rack is a dangerous rack.
Final Thoughts
The journey of strength is a marathon, not a sprint. And with a power rack in your home gym, you’ve acquired a steadfast partner for every mile. This robust, versatile, and above all, safe piece of equipment empowers you to engage in effective muscle-strengthening exercises, reaping countless health benefits as you build a stronger, more resilient body.
Remember, consistency is your most powerful tool, and a power rack makes consistency easier than ever. It removes the excuses, provides the safety net, and opens the door to a world of progressive challenges. Whether you’re lifting for health, performance, or personal growth, your power rack stands ready to support every repetition, every set, and every new personal best. Embrace the process, train smart, train safe, and watch as you confidently forge the strongest version of yourself, all from the comfort and convenience of your own home gym. Your journey to an empowered physique starts now.