In a world that constantly pulls us in different directions, finding time for consistent, effective strength training can feel like an Olympic feat in itself. The commute to the gym, waiting for equipment, and the sheer mental effort of getting out the door often stand as formidable barriers. But what if you could strip away those obstacles and bring the power of serious strength training right into your own space?
Imagine a dedicated corner of your home, equipped with the fundamental tools to sculpt your physique, boost your endurance, and fortify your mental resilience. This isn’t a fantasy for elite athletes; it’s an achievable reality for anyone, from fitness novices taking their first steps to intermediate lifters ready to shatter plateaus. Building foundational strength at home isn’t just about convenience; it’s about reclaiming your fitness journey, making it more personal, more consistent, and ultimately, more powerful.
This comprehensive guide is designed to empower you with the knowledge and actionable strategies to transform your home into a personal strength sanctuary. We’ll explore the essential equipment that forms the bedrock of any serious home gym, delve into the foundational movements that build a robust physique, and equip you with the principles of safe, progressive training. Get ready to unlock new levels of strength, confidence, and well-being, all from the comfort and control of your own home.
The Core of Your Home Gym: Understanding Power Racks and Squat Cages
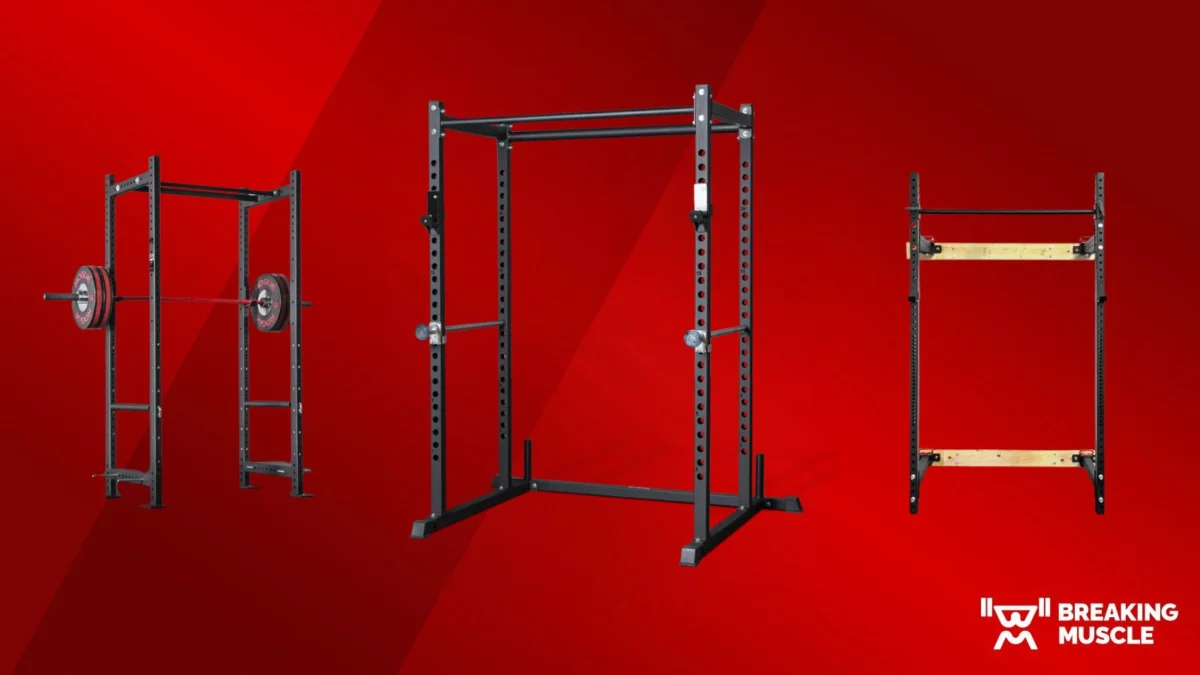
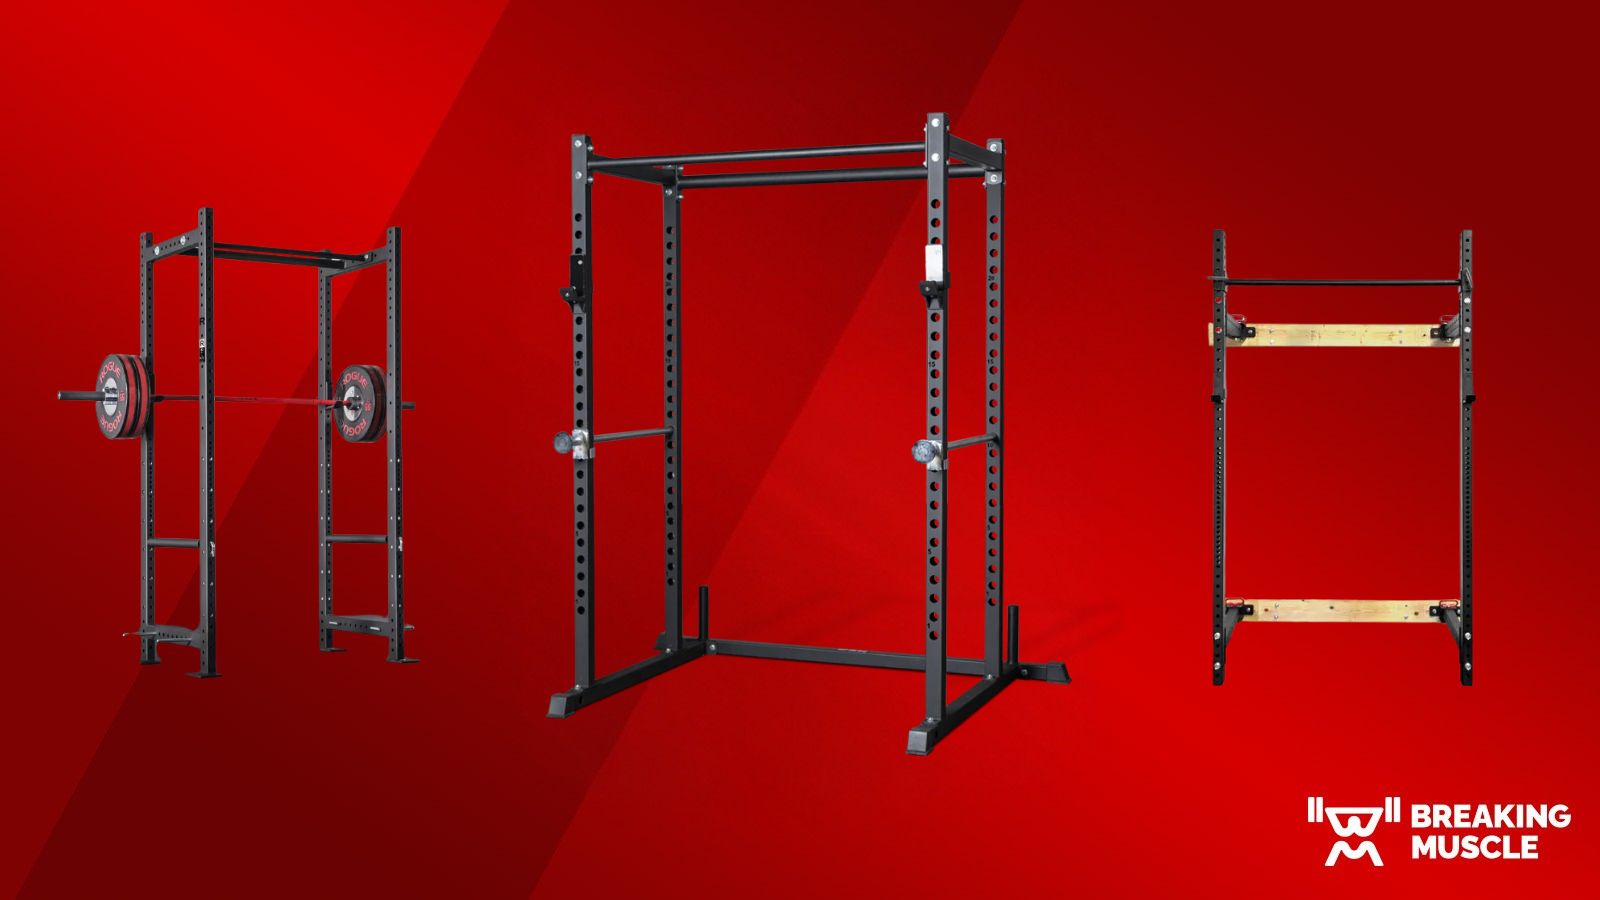
At the heart of any effective home strength training setup lies a crucial piece of equipment: the power rack or squat cage. This isn’t just a fancy stand for your barbell; it’s a safety net, a versatile training station, and the literal framework upon which your strength ambitions will be built.
What Exactly is a Power Rack (and Why You Need One)?
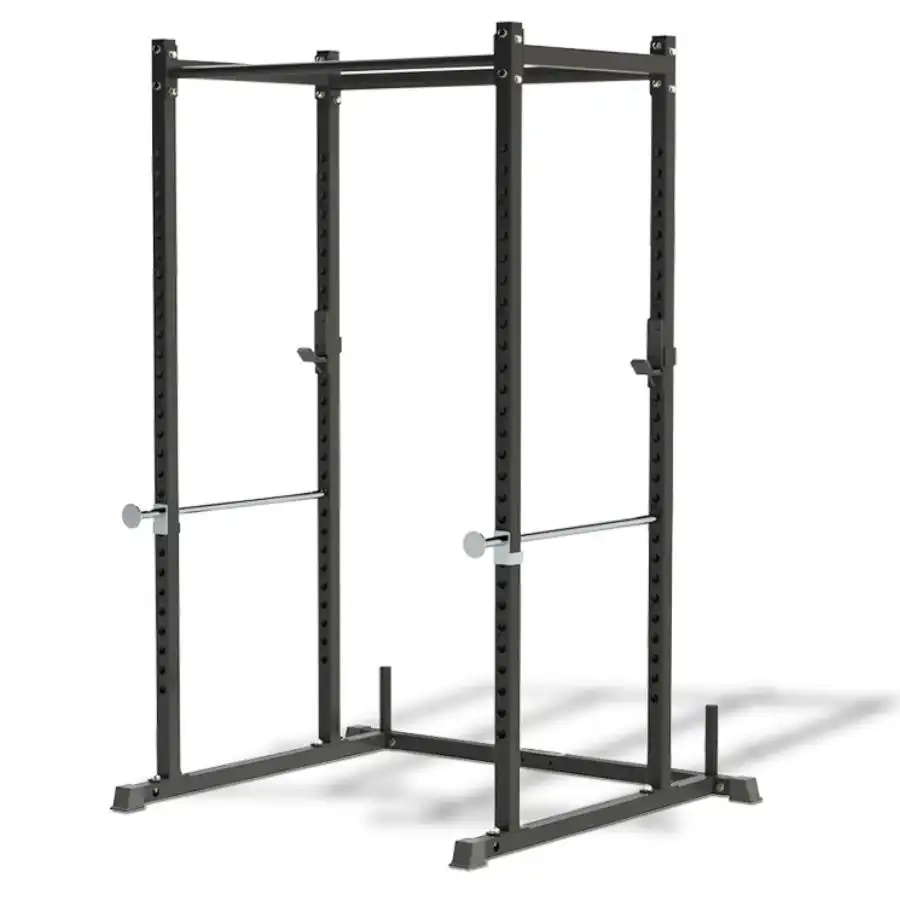
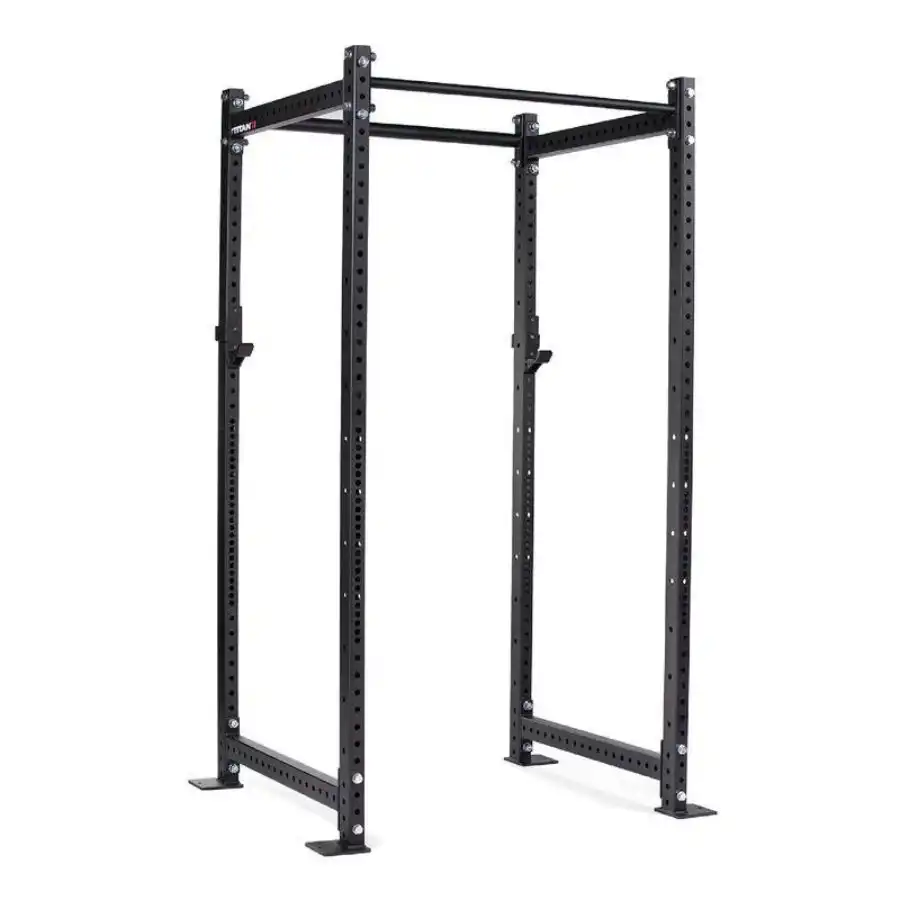
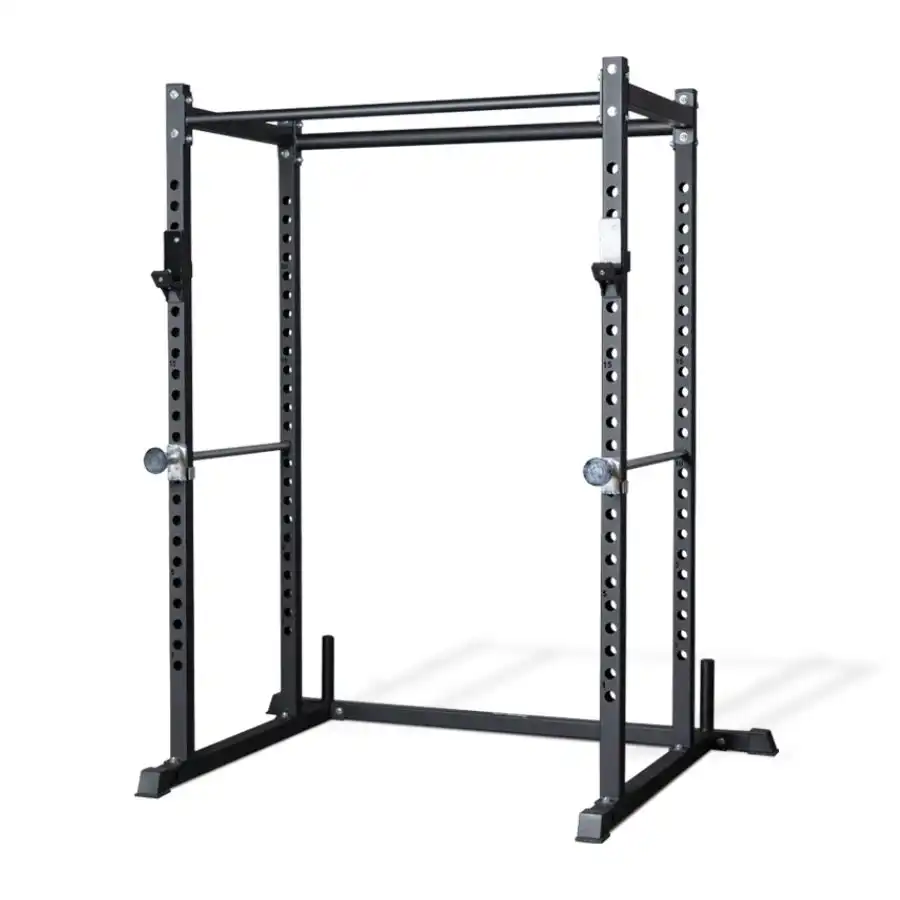
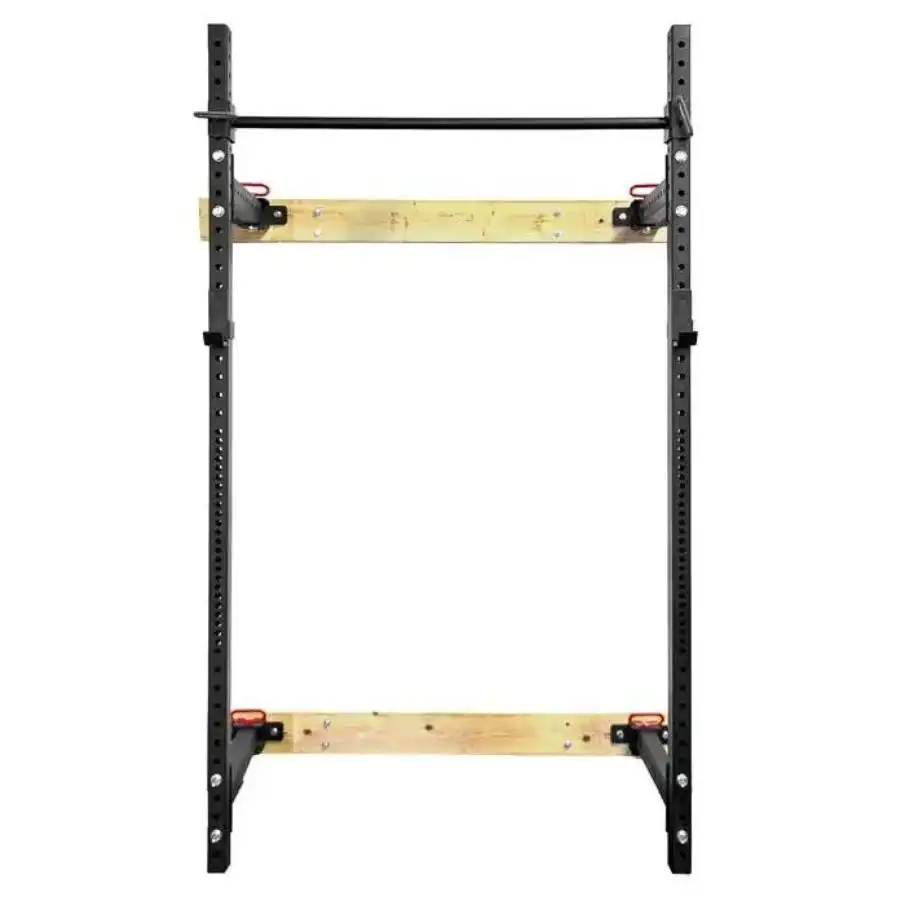
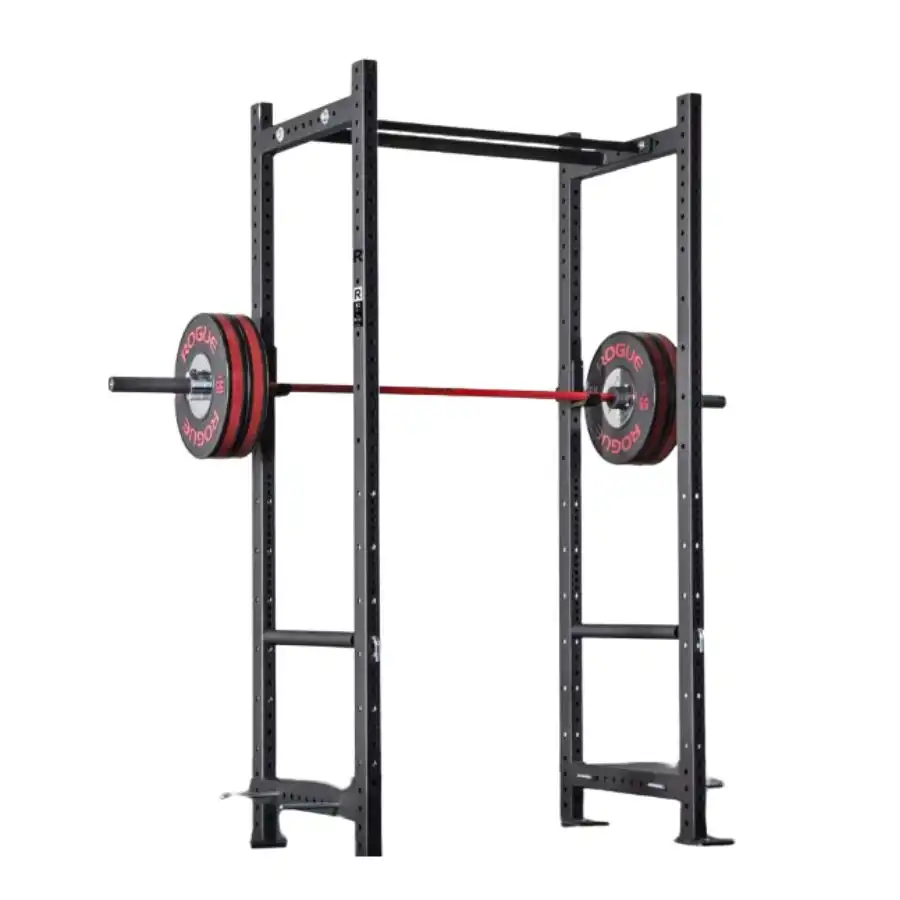
A power rack, often interchangeably called a power cage, is a four-post (or sometimes six-post) steel structure that forms a protective "cage" around the lifter. Its primary function is safety. Within this cage, adjustable horizontal safety bars (or straps) can be set at various heights. These safeties act as a spotter, catching the barbell if you fail a lift, preventing serious injury and allowing you to push your limits without fear.
Beyond safety, the power rack offers unparalleled versatility:
- Barbell Lifts: It provides a secure environment for compound exercises like squats, bench presses, overhead presses, and rack pulls.
- Accessory Work: Many racks include a pull-up bar, and most are compatible with attachments like dip stations, landmine attachments, and resistance band pegs, expanding your exercise repertoire significantly.
- Progressive Overload: The ability to confidently load heavier weights, knowing the safeties are there, is crucial for continuous strength gains.
For beginners, a power rack offers a vital confidence boost, allowing them to learn proper form with lighter weights before gradually increasing the load. For intermediate lifters, it’s indispensable for pushing past personal bests safely.
Squat Racks vs. Power Racks: Making the Right Choice
While both serve similar purposes, there are key distinctions between a full power rack and a squat rack (or squat stand):
- Power Rack (Cage):
- Structure: Four (or more) upright posts forming an enclosed cage.
- Safety: Superior, with internal safety pins/straps providing full protection from failed lifts within the cage.
- Versatility: High, accommodating numerous attachments and exercises.
- Footprint: Larger, requiring more dedicated space.
- Stability: Generally more stable due to its robust, enclosed design.
- Squat Rack (Stand):
- Structure: Two upright posts (sometimes with a connecting base) or two separate stands.
- Safety: More limited. Spotter arms are usually external and shorter, offering less protection, especially for bench presses or deep squats.
- Versatility: Lower than a full cage, though still useful for squats and presses.
- Footprint: Smaller, more portable, ideal for very tight spaces.
- Stability: Can be less stable, especially with heavy loads or dynamic movements, often requiring bolting down.
For anyone serious about foundational strength training and prioritizing safety, especially when lifting alone, a full power rack is the superior investment. Its comprehensive protection and adaptability make it the cornerstone of a high-performance home gym.
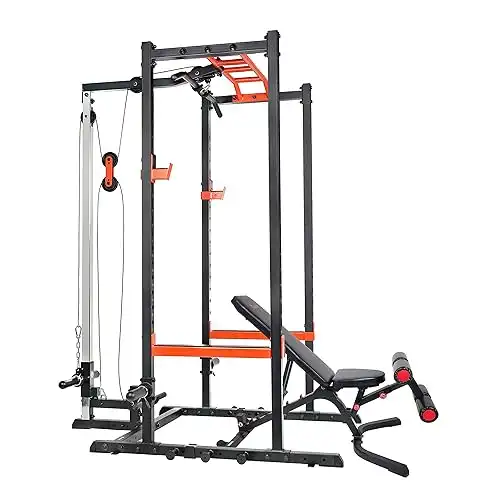
Beyond the Barbell: Versatility of Your Strength Hub
Your power rack isn’t just for barbells. It’s a multi-faceted training station waiting to be explored:
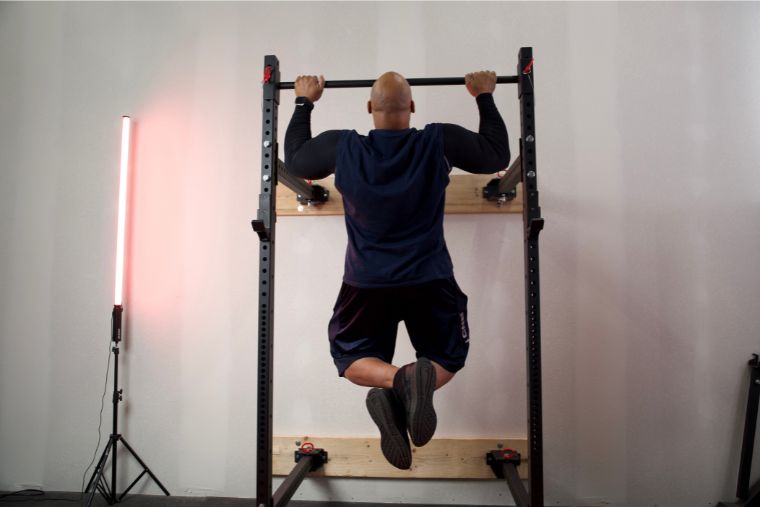
- Pull-Ups and Chin-Ups: Most racks come with an integrated pull-up bar, a fantastic tool for building upper body and back strength. Experiment with different grips (wide, narrow, neutral) to target various muscle groups.
- Dips: If your rack supports a dip attachment, this compound exercise is excellent for chest, triceps, and shoulders.
- Resistance Band Work: Attach bands to the bottom of the rack for accommodating resistance during squats or presses, or use them for warm-ups, mobility, and accessory exercises.
- Core Work: Hang from the pull-up bar for leg raises, or perform planks and other core exercises within the rack’s footprint.
- Landmine Exercises: A landmine attachment transforms your barbell into a versatile tool for rotational movements, rows, presses, and squats, adding a new dimension to your training.
By exploring these options, you’ll maximize the utility of your power rack, ensuring a comprehensive, full-body workout without needing an array of additional, space-consuming machines.
Building Your Foundation: Essential Exercises for Beginners and Intermediates
True strength isn’t built on isolation movements alone; it’s forged through compound exercises that engage multiple muscle groups simultaneously. These "big lifts" are the bedrock of any effective strength program, and your home power rack is the perfect environment to master them safely.
The Big Lifts: Squats, Bench Press, Deadlifts
These three movements are often called the "powerlifting movements" for a reason – they demand total body effort and build incredible strength.
-
Barbell Squat: The king of all exercises, the squat works your entire lower body (quads, hamstrings, glutes) and core.
- How the Rack Helps: The rack allows you to unrack the barbell at the correct height and, most critically, provides safeties to catch the bar if you can’t complete a rep. This removes the fear of getting stuck, enabling you to push harder.
- Tip: Focus on maintaining a neutral spine, driving your knees out, and squatting to at least parallel. Start with bodyweight or a light bar to perfect your form before adding significant weight.
-
Barbell Bench Press: The ultimate upper body pushing movement, targeting your chest, triceps, and front deltoids.
- How the Rack Helps: Similar to squats, the rack’s safeties are invaluable. Set them just above your chest, allowing you to bail out by simply lowering the bar onto the pins if you fail. This is especially crucial when training alone.
- Tip: Ensure your shoulders are "packed" (pulled down and back) and your feet are firmly on the floor. Maintain a slight arch in your lower back.
-
Deadlift: Often considered the ultimate test of strength, the deadlift engages almost every muscle in your body, from your calves to your traps.
- How the Rack Helps: While deadlifts are typically performed outside the rack, the rack can be used for "rack pulls" – a variation where the bar starts on the safeties at a higher position, useful for targeting specific portions of the lift or for those with lower back concerns.
- Tip: Prioritize a flat back and initiate the movement by driving through your heels, pulling the bar up along your shins. The deadlift is about lifting with your legs and hips, not your back.
Upper Body Power: Pull-ups, Rows, Overhead Press
Complementing the big three, these exercises ensure balanced upper body development and functional strength.
-
Pull-Ups/Chin-Ups: Fantastic for building a strong back, biceps, and grip strength.
- How the Rack Helps: Most power racks include a sturdy pull-up bar.
- Tip: If you can’t do full pull-ups, use an assisted band, perform negative reps (jump up and slowly lower yourself), or do inverted rows using the barbell set low in the rack.
-
Barbell Rows (Bent-Over Rows): Essential for a thick, strong back and improving posture.
- How the Rack Helps: You can perform these in front of the rack, using the J-hooks to easily re-rack the barbell between sets.
- Tip: Keep your back flat and chest up, pulling the bar towards your belly button. Avoid jerking the weight; control the movement.
-
Barbell Overhead Press (Standing Military Press): A powerful movement for building strong shoulders and triceps, also engaging the core for stability.
- How the Rack Helps: The rack allows you to unrack the barbell at shoulder height, just like a squat, making it safe to start and finish your sets.
- Tip: Keep your core tight, glutes squeezed, and press the bar directly overhead, pushing your head through at the top.
Complementary Movements: Dips, Core Work, Accessory Lifts
Don’t neglect these crucial additions to your routine for well-rounded development and injury prevention.
- Dips: If your rack has a dip attachment, this is a phenomenal bodyweight exercise for the chest, triceps, and shoulders.
- Tip: Control the descent, leaning slightly forward to emphasize the chest, or staying more upright to target triceps.
- Core Work: A strong core is fundamental for all compound lifts.
- Exercises: Hanging leg raises (from the pull-up bar), planks, Russian twists, ab rollouts (if you have an ab wheel).
- Accessory Lifts: These target smaller muscle groups, address weaknesses, and aid recovery.
- Examples: Bicep curls, tricep extensions, lateral raises, face pulls (if you have a cable attachment or bands), calf raises.
Integrating a mix of these foundational and complementary exercises will ensure comprehensive strength development, transforming you from a beginner into a formidable intermediate lifter.
Mastering Safe Lifting: Principles and Practices in Your Home Gym
The convenience of a home gym comes with the responsibility of self-spotting and meticulous attention to safety. Your power rack is your greatest ally here, but understanding its features and applying fundamental lifting principles is paramount.
Setting Up for Success: Rack Placement and Stability
Before you even touch a barbell, ensure your rack is properly set up:
- Level Surface: Place your rack on a flat, stable, and level surface. Uneven ground can compromise stability.
- Ample Space: Ensure you have enough clearance around the rack for movement, loading plates, and performing exercises without hitting walls or other equipment. Consider the depth of your bench press setup and the space needed for deadlifts.
- Anchoring (if applicable): If your rack manufacturer recommends bolting it to the floor for maximum stability, do it. This is non-negotiable for heavier lifting, especially if performing dynamic movements like kipping pull-ups. Even freestanding racks benefit from being placed on stable, non-slip flooring.
The Lifesavers: Understanding and Using Safety Spotters
This is the most critical feature of your power rack. Learn to use them correctly:
- Placement for Squats: Set the safeties just below your lowest squat position. When you squat down with an unloaded bar, the safeties should be about 1-2 inches below the bar at your deepest point. This way, if you fail, you can simply sit the bar onto the pins.
- Placement for Bench Press: Set the safeties just above your chest, allowing for a full range of motion without the bar resting on the pins during normal reps. If you fail, the bar will land safely on the pins, not your throat or chest.
- Types of Safeties:
- Pin-and-Pipe Safeties: Traditional and robust, but can be noisy and scratch bars.
- Strap Safeties: Quieter, protect barbells better, and offer a slight "give" that some lifters prefer.
- Spotter Arms: Typically shorter, external extensions. Less protective than internal safeties but useful for exercises performed outside the cage.
- Always Use Them: Regardless of how light the weight feels or how confident you are, always set your safeties. It’s better to be safe than sorry, especially when training alone.
Form First: Technique Over Ego
No amount of weight is impressive if it leads to injury. Prioritize perfect form above all else.
- Start Light: For any new exercise, begin with just the barbell or very light weights. Focus on understanding the movement pattern, engaging the correct muscles, and maintaining a neutral spine.
- Watch and Learn: Utilize high-quality instructional videos from reputable coaches to learn proper technique. Film yourself to identify flaws and compare your form to experts.
- Listen to Your Body: Pain is a warning sign. If something feels sharp or persistently uncomfortable, stop, reassess your form, and potentially reduce the weight.
- Controlled Movements: Avoid jerking or using momentum. Control the weight through both the eccentric (lowering) and concentric (lifting) phases of the movement.
Progressive Overload: The Key to Continuous Gains
Once your form is solid, progressive overload is the engine of strength gain. It simply means consistently challenging your muscles over time.
- Increase Weight: The most common method. When you can comfortably hit your target reps for a given weight, increase the load slightly.
- Increase Reps/Sets: Perform more repetitions or add another set with the same weight.
- Increase Frequency: Train a muscle group more often (e.g., twice a week instead of once).
- Decrease Rest Time: Shorten the rest periods between sets, increasing intensity.
- Improve Form: While not directly adding "load," better form allows you to lift the intended weight more effectively and safely, which is a form of progression.
By diligently applying these safety principles and consistently challenging your body, you’ll build not only strength but also a deep, intuitive understanding of your body’s capabilities.
Designing Your Training Program: From Novice to Intermediate Power
A well-structured program is your roadmap to consistent progress. It removes guesswork and ensures you’re training effectively for your goals.
Starting Strong: A Sample Beginner Routine (3 Days/Week)
For beginners, a full-body approach three times a week is highly effective for building a solid foundation and mastering movement patterns. Focus on compound lifts with moderate weight and perfect form.
Workout A:
- Barbell Squats: 3 sets of 5-8 reps
- Barbell Bench Press: 3 sets of 5-8 reps
- Bent-Over Barbell Rows: 3 sets of 8-12 reps
- Plank: 3 sets, hold for 30-60 seconds
- Face Pulls (with band/cable attachment): 3 sets of 12-15 reps
Workout B:
- Barbell Deadlifts: 1-2 sets of 5 reps (focus on technique, don’t go to failure)
- Overhead Press: 3 sets of 5-8 reps
- Pull-Ups/Chin-Ups (or assisted variation): 3 sets to failure/target reps
- Dips (or assisted variation): 3 sets to failure/target reps
- Bicep Curls: 3 sets of 10-15 reps
Schedule: A/Rest/B/Rest/A/Rest/Rest (or B/Rest/A/Rest/B/Rest/Rest the following week)
Key Beginner Principles:
- Consistency: Show up for every planned workout.
- Form Over Weight: Never sacrifice good technique for heavier loads.
- Rest and Recovery: Allow your muscles to repair and grow. Aim for 7-9 hours of sleep.
- Nutrition: Support your training with adequate protein, carbohydrates, and healthy fats.
Stepping Up: Intermediate Program Considerations
As you progress, your body adapts, and a more nuanced approach can yield continued gains. Intermediate programs often introduce more volume (sets/reps), varied rep ranges, and potentially split routines.
- Increased Volume: You might add a fourth set to your main lifts or incorporate more accessory exercises.
- Varied Rep Ranges: Instead of always 5-8 reps, you might cycle through periods of heavy, low reps (e.g., 3-5) for strength and lighter, higher reps (e.g., 8-12) for hypertrophy (muscle growth).
- Split Routines: Instead of full-body, you could divide your training into muscle groups (e.g., Upper/Lower split, Push/Pull/Legs).
- Example Upper/Lower Split (4 Days/Week):
- Day 1: Upper Body: Bench Press, Overhead Press, Rows, Pull-Ups, Bicep Curls, Tricep Extensions.
- Day 2: Lower Body: Squats, Deadlifts (or variations), Lunges, Calf Raises.
- Day 3: Rest
- Day 4: Upper Body (different variations/rep schemes): Incline Press (with adjustable bench), Dumbbell Rows, Dips, Lateral Raises.
- Day 5: Lower Body (different variations/rep schemes): Front Squats, Romanian Deadlifts, Glute Bridges.
- Day 6 & 7: Rest
- Example Upper/Lower Split (4 Days/Week):
- Accessory Work: Become more strategic with accessory lifts to target specific weaknesses or muscle groups you want to develop.
Periodization Basics: Planning for Long-Term Progress
To avoid plateaus and burnout, intermediate lifters benefit from a basic understanding of periodization – varying your training over time.
- Cycles: Think in terms of mesocycles (e.g., 4-6 weeks) where you focus on a specific goal (e.g., strength phase, hypertrophy phase).
- Deload Weeks: Every 4-8 weeks, reduce your training volume and/or intensity significantly (e.g., 50-60% of normal) for a week. This allows your body to recover, reduces injury risk, and prepares you for the next training block.
- Progressive Challenge: Continuously seek ways to apply progressive overload, whether through weight, reps, sets, or more challenging exercise variations.
By thoughtfully structuring your program and understanding these principles, you’ll ensure your home strength journey is one of continuous growth and sustained results.
Optimizing Your Home Strength Setup: Beyond the Rack
While the power rack is the central pillar, a few other essential pieces of equipment will complete your home gym and unlock its full potential.
Essential Add-ons: Bench, Barbell, Plates
These are the non-negotiables that turn your rack into a complete strength training station.
- Adjustable Weight Bench: A sturdy, adjustable bench is critical for bench presses (flat, incline, decline), dumbbell work, step-ups, and a host of other exercises. Look for one that is stable, has multiple incline settings, and can handle your body weight plus your heaviest lifts.
- Quality Barbell: Don’t skimp here. A good Olympic barbell (20kg/45lb for men, 15kg/33lb for women) with appropriate knurling and spin will last a lifetime and feel much better to lift with. Avoid cheap, generic bars that can bend or have poor knurling.
- Weight Plates: Start with a selection of iron or rubber-coated plates. Prioritize 2.5lb, 5lb, 10lb, 25lb, and 45lb plates to allow for gradual weight increases. Bumper plates (made of dense rubber) are excellent if you plan on Olympic lifting or if you’re concerned about dropping weights on your floor. Ensure you have sturdy barbell collars to keep plates secure.
Smart Accessories: Bands, Dumbbells, Kettlebells
These versatile tools expand your exercise options without demanding excessive space.
- Resistance Bands: A set of loop bands (various resistances) is incredibly useful for warm-ups, mobility, activation exercises, accommodating resistance, and even assistance for pull-ups.
- Adjustable Dumbbells or a Light Set: While barbells are primary, dumbbells allow for unilateral (one side at a time) training, isolation exercises, and movements that might be awkward with a barbell. Adjustable dumbbells are a fantastic space-saving solution.
- Kettlebells (Optional): A medium-weight kettlebell can add a dynamic element to your training with swings, Turkish get-ups, and goblet squats, enhancing explosiveness and conditioning.
Maximizing Space: Smart Storage and Multi-functional Gear
Even in a small space, organization is key to safety and efficiency.
- Plate Storage: Many power racks come with plate storage pegs. If not, invest in a vertical plate tree to keep your weights off the floor and easily accessible.
- Barbell Storage: Store your barbell vertically in a corner or horizontally on wall-mounted hangers to prevent tripping hazards and save space.
- Bench Storage: Choose a bench that can be easily moved or stored upright when not in use.
- Foldable Racks: If space is a severe limitation, consider a wall-mounted folding power rack that can be collapsed against the wall when not in use.
- Multi-functional Attachments: Opt for attachments that serve multiple purposes, like a dip station that also functions as a leg raise station.
By thoughtfully selecting and organizing your equipment, you can create a highly functional and inspiring home gym that fuels your strength journey for years to come.
Overcoming Challenges: Staying Motivated and Consistent
Building strength is a marathon, not a sprint. There will be days when motivation wanes, but with the right strategies, you can maintain consistency and keep progressing.
Setting Realistic Goals
Unrealistic goals lead to frustration. Instead, set smart, achievable objectives:
- Specific: "I want to squat 200 pounds" instead of "I want to get strong."
- Measurable: "I will add 5 pounds to my bench press every two weeks for two months."
- Achievable: Ensure your goals are within reach given your current fitness level and time commitment.
- Relevant: Your goals should align with your overall fitness vision.
- Time-bound: Give yourself a deadline to create a sense of urgency.
Break down larger goals into smaller, manageable milestones. Celebrate each small victory to build momentum.
Tracking Progress for Momentum
What gets measured gets managed. Tracking your workouts is a powerful motivator.
- Workout Journal: Use a notebook or a fitness app to record every set, rep, and weight lifted. Note how you felt, any form issues, or personal bests.
- Photo/Video Progress: Periodically take photos or videos of your physique and lifting form. Seeing physical changes or improvements in technique can be incredibly motivating.
- Performance Metrics: Beyond just weight, track other metrics like how long you can hold a plank, how many pull-ups you can do, or your recovery times.
Reviewing your progress regularly will highlight how far you’ve come and provide the fuel to keep pushing forward.
The Power of Routine
Consistency is the single most important factor in long-term success. Establish a routine and stick to it.
- Schedule Your Workouts: Treat your training sessions like important appointments. Block out time in your calendar.
- Create a Dedicated Space: Your home gym should be inviting and ready for action. Keep it clean and organized.
- Minimize Distractions: When it’s time to train, put your phone away, turn off the TV, and focus solely on your workout.
- Pre- and Post-Workout Rituals: A consistent warm-up and cool-down routine can signal to your body and mind that it’s time to train and time to recover.
- Find Your "Why": Remind yourself why you started this journey. Is it for health, confidence, mental clarity, or a specific performance goal? Reconnecting with your purpose can reignite your drive.
Building a powerful physique and an unbreakable spirit from your home gym is a testament to your dedication. Embrace the process, celebrate your progress, and trust in your ability to continually evolve.
Conclusion: Forge Your Future, One Lift at a Time
You now possess the blueprint to establish a formidable strength training regimen within the sanctuary of your own home. We’ve explored the indispensable role of the power rack, demystified foundational exercises, emphasized the non-negotiable principles of safety, and outlined strategies for program design and sustained motivation.
Remember, strength is not merely measured in pounds lifted or muscles gained; it’s a profound transformation that ripples through every aspect of your life. It’s the confidence to tackle new challenges, the resilience to push through discomfort, and the unwavering belief in your own capabilities. Your home gym isn’t just a collection of equipment; it’s a personal forge where you craft a stronger, healthier, and more empowered version of yourself.
The journey of strength is personal, rewarding, and ongoing. Embrace the process, listen to your body, and celebrate every milestone, big or small. The power to transform your physique and elevate your spirit resides within you, and with your dedicated home setup, you have the ultimate tool to unleash it. Step into your power rack, grab that barbell, and begin forging the stronger future you deserve. Your time to become an unstoppable force starts now.